1 Intro
Thank you very much for buying our Purism Wordpress Theme. We have created an user-friendly file documentation to help you quickly customize the Purism Wordpress Theme.
We hope that you can work with our Wordpress theme easily and that you will have a lot of success with our theme to reach your personal goals.
If you have any questions, suggestions or hints that aren’t stated in this documentation, feel free to contact us at our Egotype Envato Page where we are able to provide more detailed support.
We put a lot of work and spend many hours into the Purism Theme and we are full of hope that you will love the theme as much as we do.
We try our best to setup and design a special Blog Theme with a lot of nice and helpful features, lovely styles and great design. For an author it is very important to get customer feedback. We need to hear what could be better, what is needed and where are problems for you as a user. Your opinion is very important for us.
So maybe we could make a deal: If you love the theme (and we really hope you will love it) please take a minute of your time and rate our theme with 5 Stars here.
If you want to rate the item less than 4 or 5 stars please give us the chance to get in contact to provide support and hopefully we can change your opinion to reach the 5 stars.
We will appreciate if you can rate and review Purism Wordpress Theme on ThemeForest Rating Page.
Thank you so much and have fun with our wordpress theme.
Egotype Design
2 Installation
2.1 Theme Installation
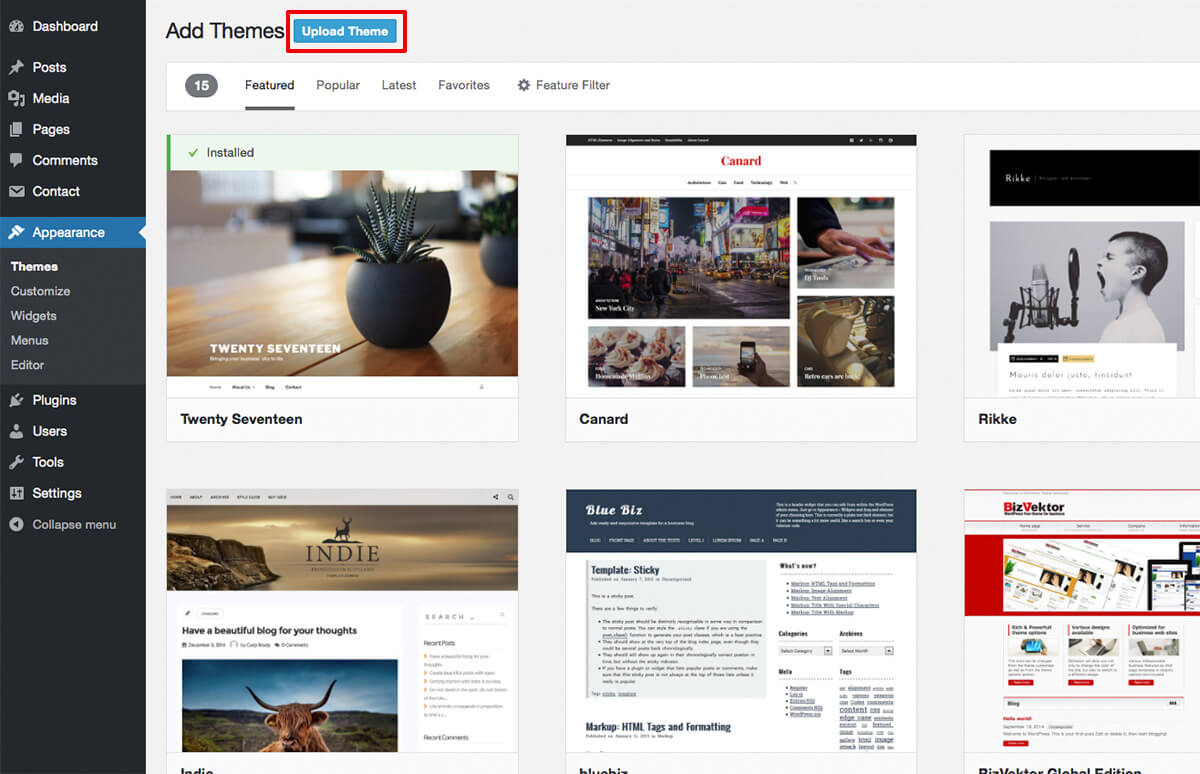
- Login to your Wordpress admin panel. When you logged please navigate to Appearance → Themes . There you will find an overview of your already installed wordpress themes.
- Click Add New at the top of the themes page. If the next page is loaded please press Upload Theme . A upload will be shown - please press and follow step 3.
- Please go to the folder where your purism.zip file is located (Attention: please use the zip file - do not extract the files before) The purism zip is included in the files that you have downloaded from Themeforest. Please select the zip file and press "Install Now".
- When purism.zip file is uploaded and installed please click Activate to make sure that the theme will be activated as your used theme in your Wordpress installation.
2.2 Plugin Installation
After activating the theme you will see the notification message on the top of the admin page.
- Please click Begin Installing Plugins .
- Please select all the plugins in the list and choose Install from the drop-down menu. If done please click Apply .
If you don't want to install and uses a Shop System on your Wordpress Website, you don´t need to install or activate the following plugins:
- WooCommerce
- YITH WooCommerce Quick View
- YITH WooCommerce Wishlist
2.3 Theme Update
There are a couple of ways to update the Purism Wordpress Theme to the latest version:
But before you update: Let´s do a backup of your theme.
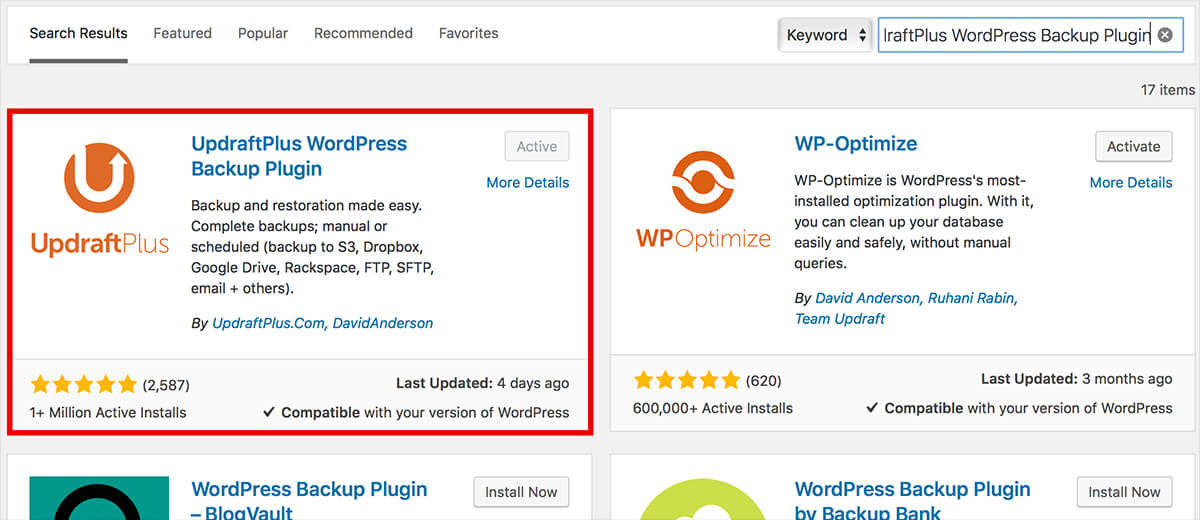
Backup the current version of the theme. To create a backup of your theme we highly recommend to install and use the "UpdraftPlus WordPress Backup Plugin".
- Navigate to Plugins → Add new
- Search "UpdraftPlus WordPress Backup Plugin" (Screenshot below)
- Install and activate the plugin
- Navigate to Settings → UpdraftPlus Backups
- Click Backup Now
To restore the theme and system to the latest backup, please click Restore and follow the steps in the description.
Method 1: Update Through Wordpress Admin Panel
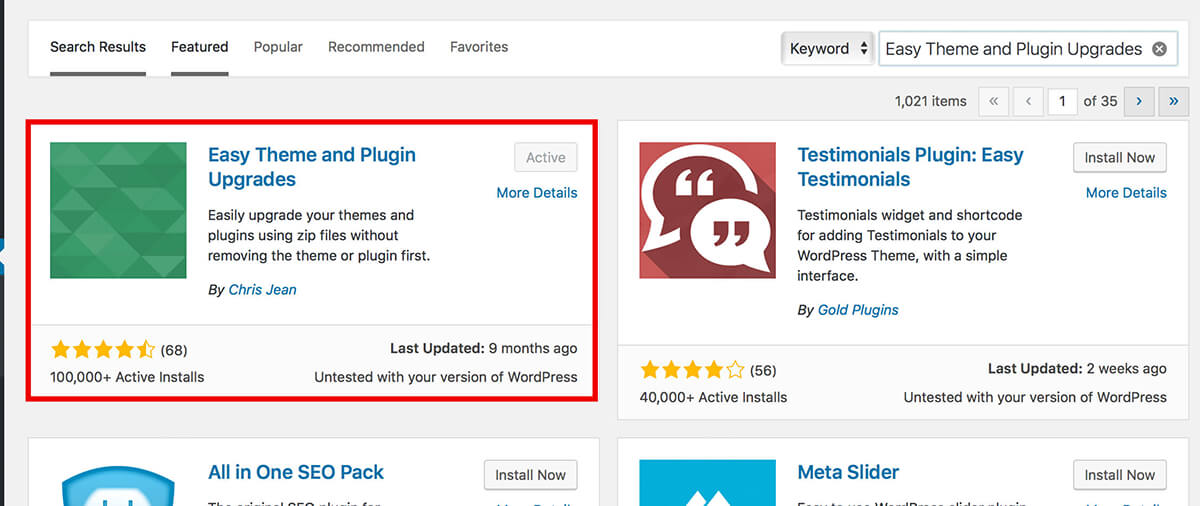
For this method you should first install and activate "Easy Theme and Plugin Upgrades" Plugin. Unzip the file you just downloaded from ThemeForest and locate the WordPress Theme (purism.zip).
- Navigate to Plugins → Add new
- Search "Easy Theme and Plugin Upgrades" (Screenshot below)
- Install and activate the plugin
- Click on Appearance → Themes
- Still within the Themes section, on header tab, click on Install Themes, then on header second tab click Upload
- Click Browse… and locate the new theme file (purism.zip)
- Click Install Now
- Click Activate
Method 2: Install the WordPress Envato Market plugin
- Download the Envato Market plugin
- Navigate to WP Dashboard → Plugins → Add new
- Upload the Plugin (envato-market.zip)
- Install and Activate the plugin.
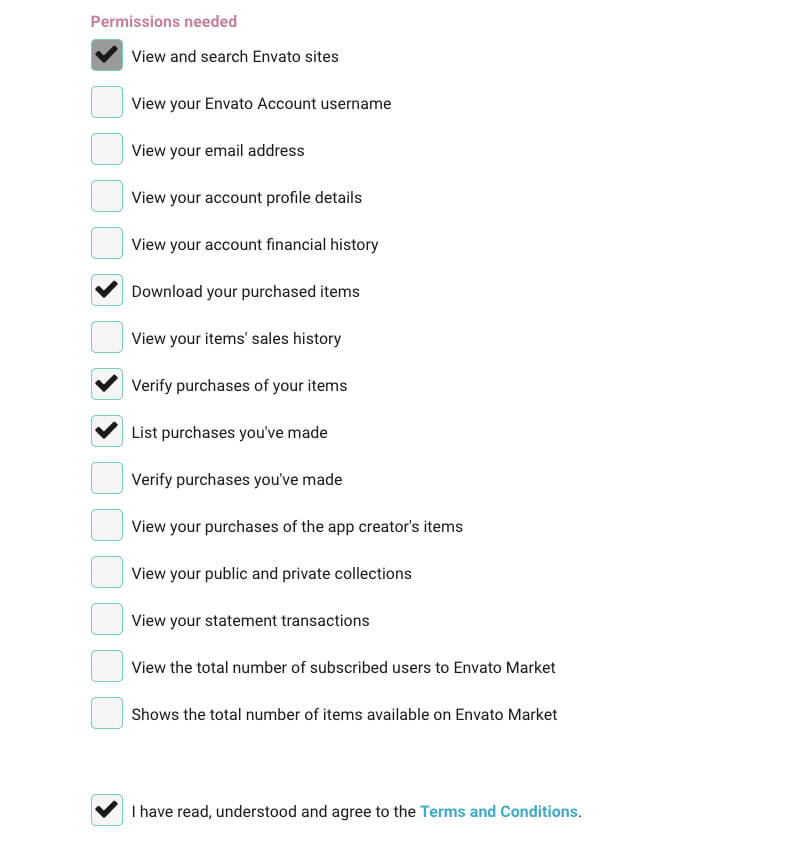
- Navigate to the Envato Market menu, follow the instructions to generate a Global OAuth Personal Token, and enter the Token in your WordPress Dashboard
Method 3: Manually Install the Update without Plugin
To install a new version of the theme manually:
Unzip the file you just downloaded from ThemeForest and locate the WordPress Theme. (purism.zip)
- Log into your WordPress Dashboard
- Click on Appearance → Themes
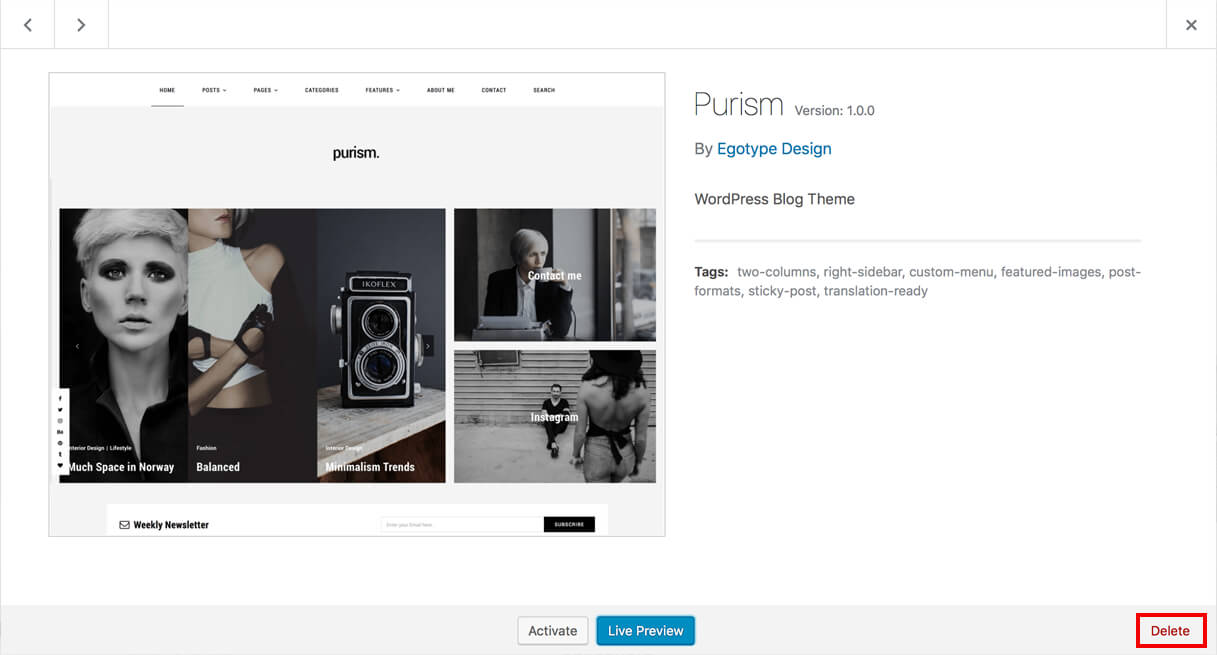
- Please now click and activate a standard theme of Wordpress that you will find in the theme overview (e.g. Theme "twenty seventeen")
- Now choose Purism Theme (theme details) und delete the theme
- Now please upload the downloaded Purism Theme Update (purism.zip)
- Once the theme was uploaded please click install and activate the theme
Now you will find the latest version of your theme also in your front end website.
Delete the old version and reinstall the latest version. You will not be able to install the new version while the old version is still installed.
2.4 Theme Translation
To translate the Purism Blog Theme you need the editor Poedit. Please download Poedit here
and install.- Open Poedit and open File → New from .POT-/.PO-File or choose second point Create New Translation
- Choose the .POT from Purism Theme. You will find this file in the theme folder: wp-content/themes/purism/lang/purism.pot
- A window will displayed, where you can choose your language
- Press "Ok" and Poedit will give file name automatically, e.g.: if you choose "spanish" the file will called es_ES.po, if you choose "german" the file is called de_DE.po
- Save your created file on your computer
- Now you can start to translate the theme or plugin. The field on top will show you the text that could be translated. The text which is already translated will be shown on the right. The fields at the bottom will show you the source text, your translation and notes for the translator. Translation is pretty - choose a word or a sentence, put in your translation - done. Go to the next.
- Take care of special character of the original text you are translating
- If you want to save time and it is not necessary to translate all strings from the backend dashboard
- If you have finished your translation please save your file. Poedit will generate a .PO- and a .MO-File. Please upload both files into the language folder of your theme (wp-content/themes/purism/lang).
3 Demo Content
Please note: Importing the Purism demo content is optional.
If you want to install and work with the Demo content of our Purism Theme, please fill in the following form.
Please fill in your email address and the purchase code. You will find the purchase code in your Purchase Confirmation Mail that was sent to you by Envato System.
When form is filled correctly please click the "Order Demo Content" Button and you will receive a message from us instantely. Please check also your Spam folder if the mail is not going into your mail inbox.
Thank you
Purism Wordpress Theme comes with a single-click importable demo content (pages, blog posts, customizer settings, etc.) to help you get.
We recommend that you start with a new and fresh WordPress installation to get the best results after importing the purism demo file. If you have an existing blog we cannot guarantee that the demo content will be looks the same like in our preview website. That is caused of your own, individual content, different usage of plugins or widgets etc.)
Before importing, make sure you have installed the Theme and recommended Plugins. Especially note, that you have installed the One Click Demo Import plugin.
- Navigate to Appearance → Import Demo Data .
- Choose the purism-content.xml file for content import.
- Optional: Choose a purism-widgets.wie for widget import.
- Optional: Choose a purism-customizer.dat file for customizer import.
- Click Import Demo Data.
Remember: After importing the demo content you may uninstall the One Click Demo Import plugin.
4 Posts
4.1 Creating a Post
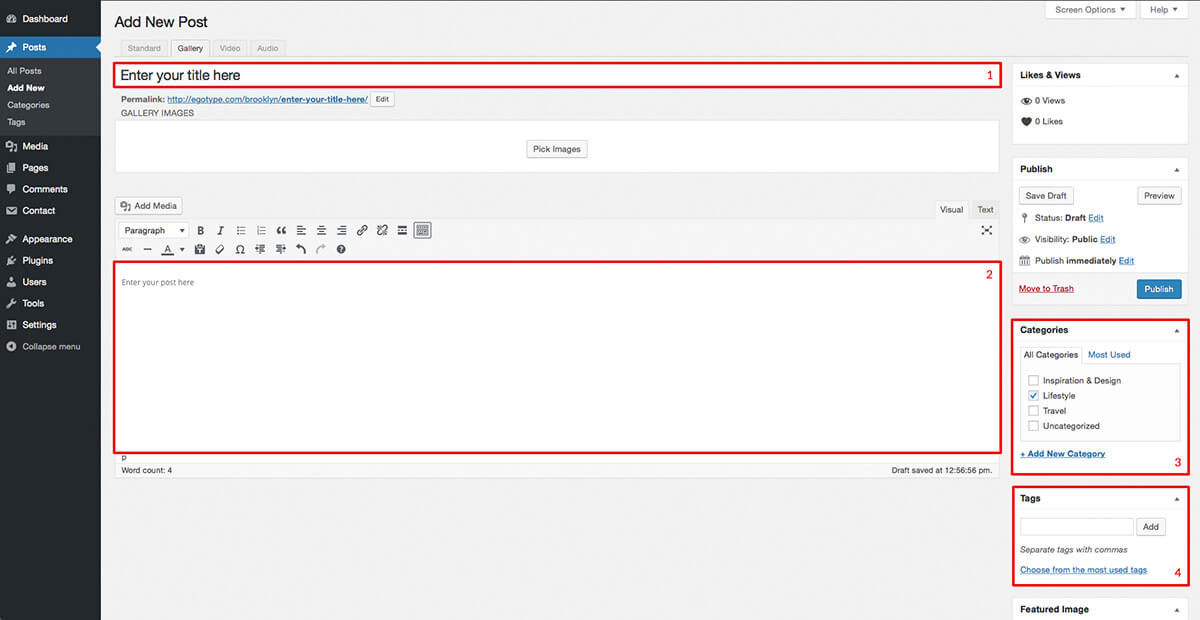
To create a new post, go to Wordpress admin panel and navigate to Posts → Add New .
Once you've set your prefered post format (please see also: Post Types) you can enter your post title and add your content. Remember: Please make sure to assign at least 1 category to your post. You can also add specific tags to your Post.
4.2 Post Types
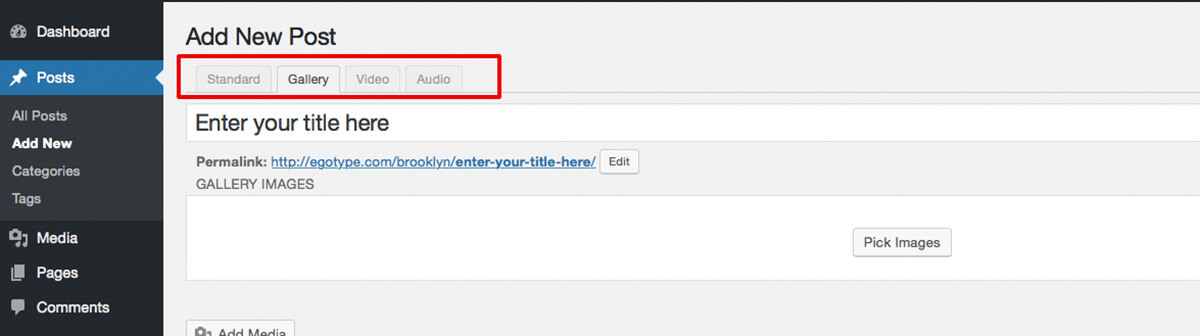
Purism has the option to create 4 different post formats: standard, gallery, video, and audio
In order to activate these post options, you'll first want to ensure you've installed & activated the required Vafpress Post Formats UI plugin. This Vafpress plugin comes also included with this theme. When you activate Purism for the first time, you should get a banner notification at the top of your dashboard advising you to install specific required & recommended plugins.
Select the format you'd like and want to use for your Post. Each Post option will give you different content input boxes depending on the content you would like to add.
Standard Post
A standard post is the default and standard post type where you can add text and images to your post using the tools and content box.
Gallery Post
A gallery post allows you to create a slideshow-type gallery at the top of your post. After clicking the "Gallery" tab to choose this post format option, click Pick Images within the "Gallery Images" box that has appeared. Select your images you would like to add from your WordPress Media Library (the Media Library will open after click automatically).

Video Post
A video post displays a video at the top of your post. You can share videos from nearly all video hosting sites, such as Vimeo or Youtube. You only need to copy the video URL and paste the url (Video URL, oembed code or embed code) into the special input box. When you preview or publish your post, the video will appear and you will see the video on your video post page.
Audio Post
An audio post allows you to share a music or audio track and displays it at the top of the post. Like in the video post, simply copy & paste the URL of the music track (Audio URL, oembed code or embed code) into the special audio input box. When you preview or publish the post, the track will appear and you will see the audio player on your audio post page.
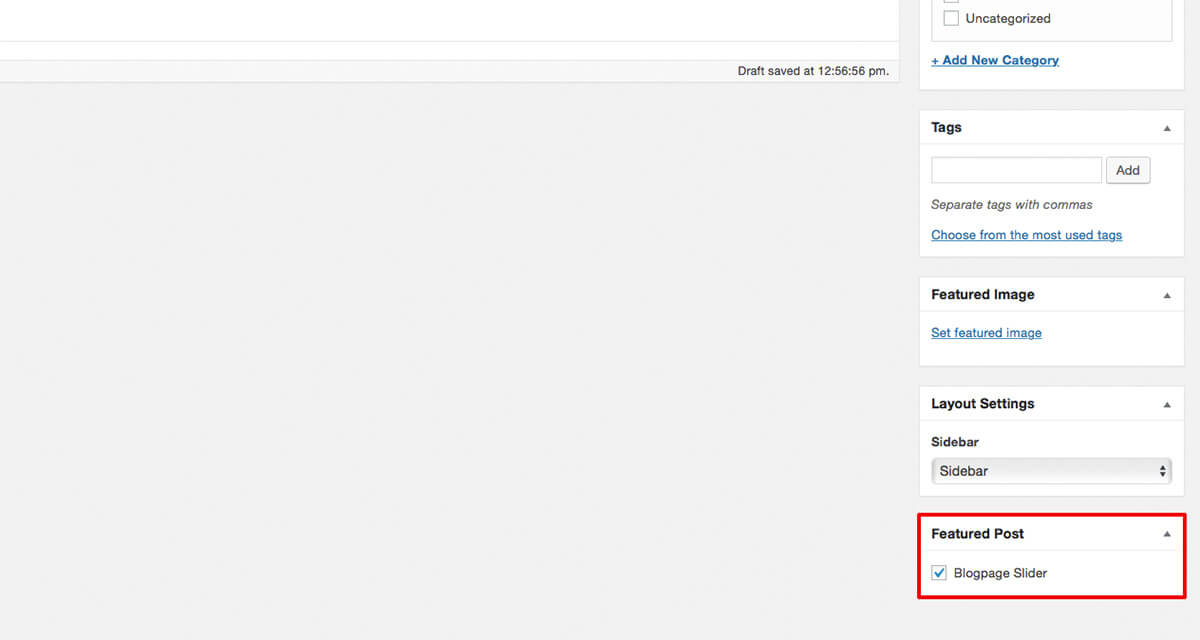
4.3 Featured Post
You want to feature a post (or more) in the Purism Theme Blog Page Slider? It is very easy.
In order to feature a post, please navigate to Post Edit page and please set the check button in Blog Page Slider in the Featured Post metabox. You can feature as many posts as you want in Blog Page Slider, but we would recommend an amount of 3 to 5 featured Posts. (See also: Featured Post Slider)
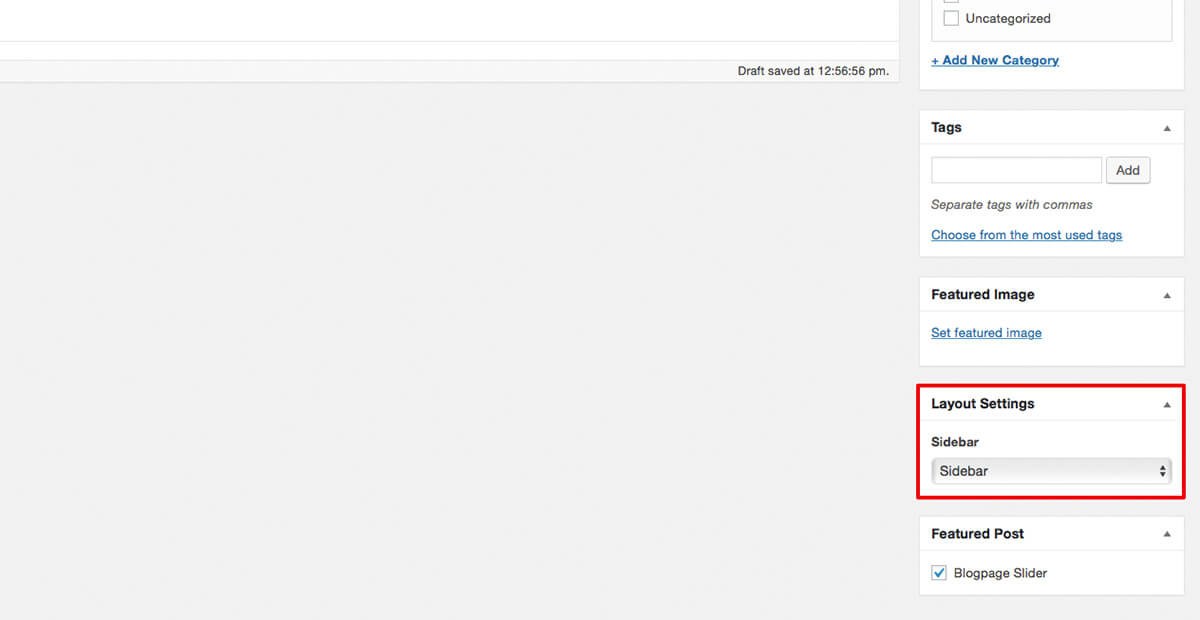
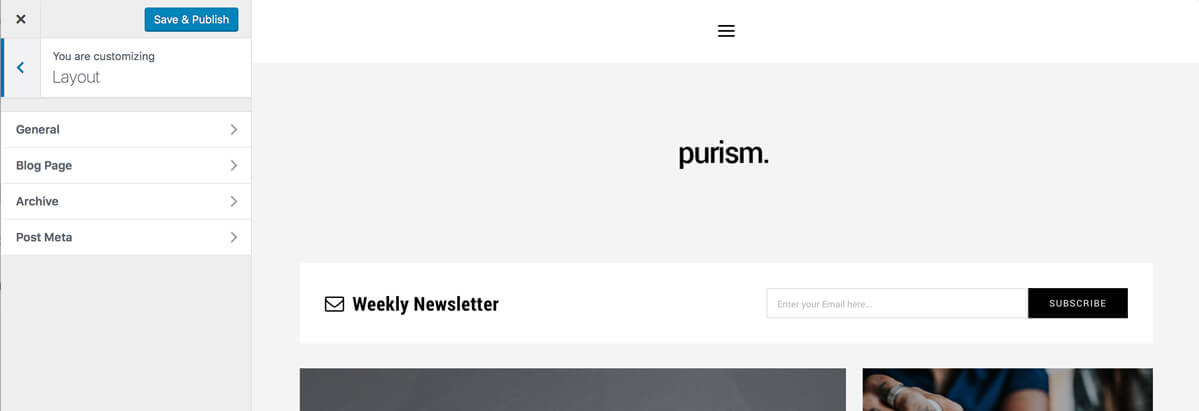
4.4 Layout Options
You have the option to choose between a number of post templates via the drop-down menu on the right titled "Template" [1]:
- Default Template (Boxed Featured Image)
- Full Width Featured Image
Additionally, each post can be configured individually to show right sidebar or shop sidebar or no sidebar. Please choose the option you want from the select field in the "Layout Settings" metabox [2]. (See also: Sidebar)
To realize global adjustments to your posts:
- Go to Wordpress admin panel and navigate to Appearance → Customize
- Open the Tab Layout → General
Here you will find the possibility to include the post format for your blog and archive pages. That means
for example: if you have chosen the video post format the video will be shown. If not the stated featured
image will be displayed here.
Also you are able to determine whether you want to show an excerpt or content in your standard post.
Additional you can choose that excerpt will be displayed and how long the excerpt content should be.
4.5 Metas
You may hide certain Post Meta.
- Go to Wordpress admin panel and navigate to Appearance → Customize
- Open the Tab Layout → Post Meta
How to add additional meta information about the author:
Each post author is able to add their own social accounts and author info. The author meta information will be displayed below the post content and the author archive page below the header title.
To adjust the author meta information please go to Users → All Users Select the Author add the Author Info and /or the URLs of the Social Accounts. To apply your updated profile and meta information please click Update Profile.
5 Pages
Creating a standard (static) page is very similar to creating a post in many ways and is perfect for creating pages like an "About Me" or "Contact" section" on your Wordpress website.
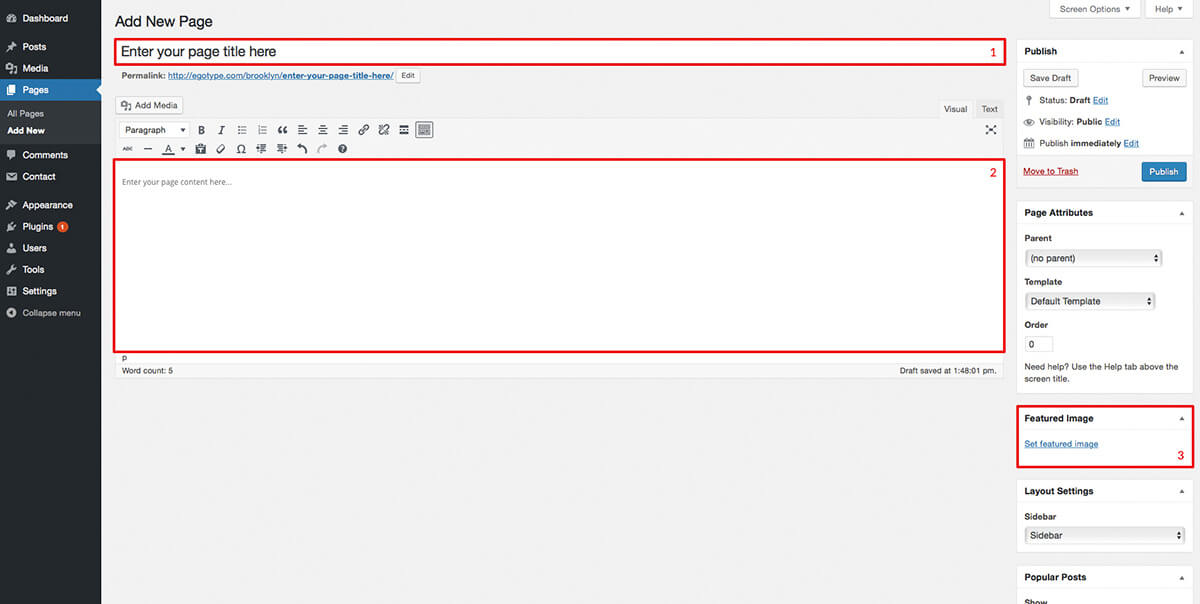
5.1 Creating a Page
To create a new page, go to Wordpress admin panel and navigate to Pages → Add New .
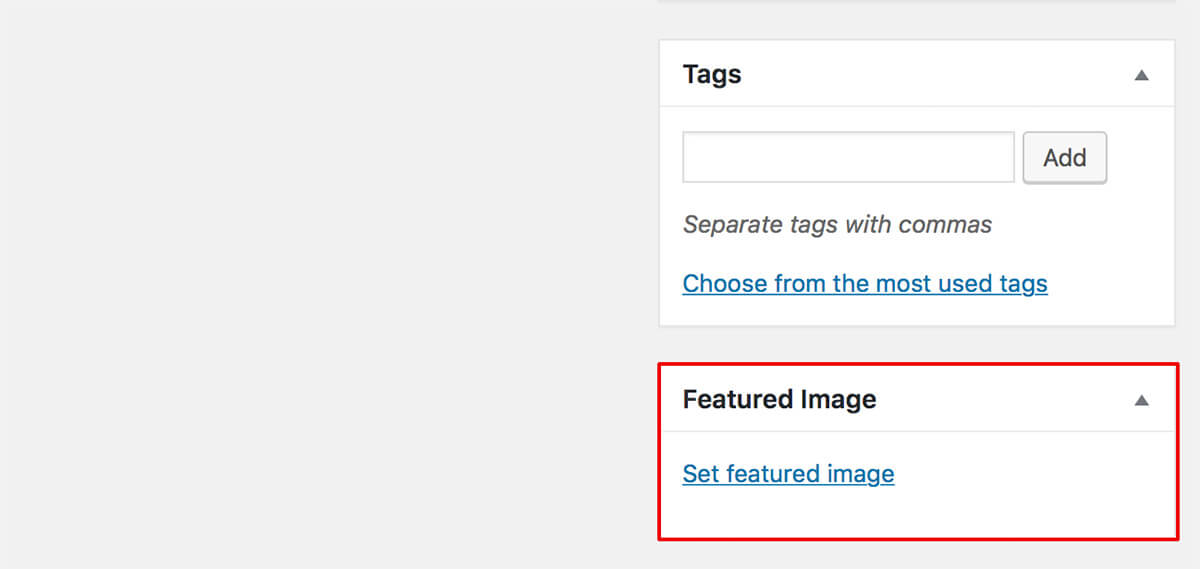
Similar to creating a post, you can enter a page title, add content and assign a featured image.
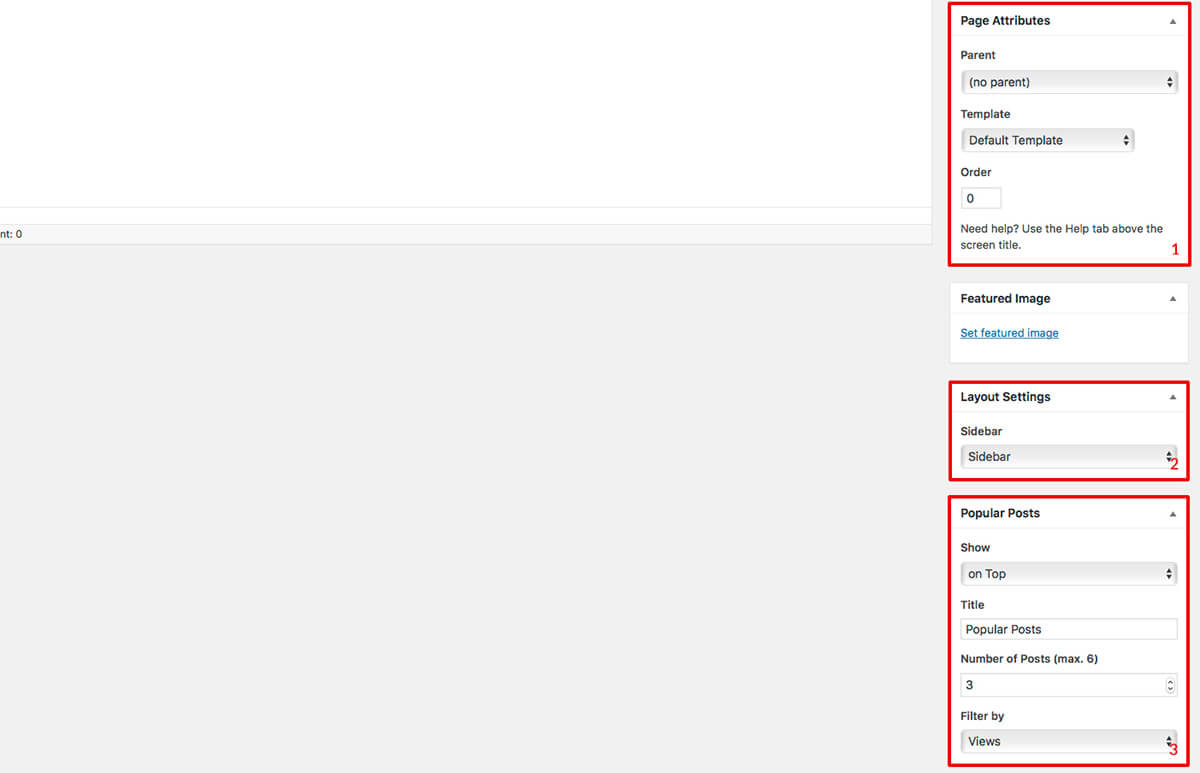
5.2 Layout Options
Additionally, you have the option to choose between a number of page templates via the drop-down menu on the right titled "Template" [1]:
- Default Template (Boxed Featured Image)
- Full Width Featured Image
- Full Width Headline (Boxed Featured Image; Headline in full width Section on top)
Each page can be adjusted individually to have either right sidebar, right shop sidebar or no sidebar. Please choose the option you want from the select field in the Layout Settings metabox [2]. (See also: Sidebar)
Also you can show the most popular posts at the top or the bottom of your page. You find several options in the "Popular Posts" metabox to adjust like title, position, amount or filter to adjust the information to your needs [3].
5.3 Meta: Share Buttons
If you want to hide the Share Buttons of the Page Content.
- Go to Wordpress admin panel and navigate to Appearance → Customize
- Open the Tab Layout → Post Meta
- Move the Toggle Share Buttons Page Content to the left

6 Category Pages
6.1 Creating a Category Page
Attention: Creating a Category Page is different to creating a static page (described on Creating a Page)
A category page is a dynamic page that summarize all your posts assigned with a specific category (e.g.: Category "Travel" - all published posts that are assigned to the Travel category will be shown on Travel category page).
A category page is generated by WordPress after adding a category to a post (See also: Creating a Post). It will not automatically appear as a menu item in your navigation menu. To give visitors an easy access to your category pages, you can add the category page to your menu by yourself. (See also: Creating the Menu)
6.2 Layout Options
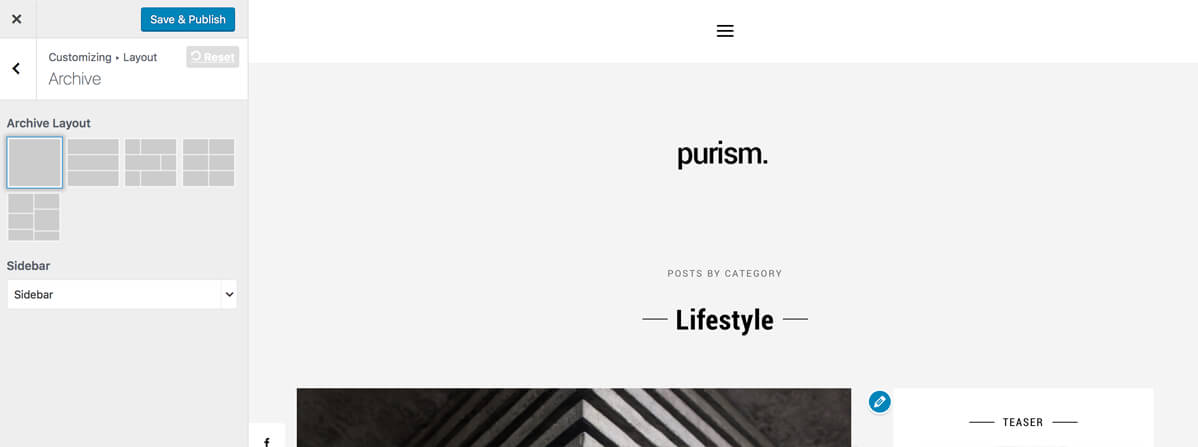
Category Pages which display all posts to a specific category, tag, date or author (See also: Metas) are called "Archive Pages".
To change the page layout of your archive pages, head to Appearance → Customize → Layout and choose from the layout options within the Archive section.
Purism supports five archive layouts: Standard, List, Grid, Chess and Masonry.
For the List-, Grid-, Chess- and Masonry-Layout you can also view the First Post as
Standard Layout.
You can also enable the right sidebar or right shop sidebar or
disable the sidebar from displaying on archive pages.
7 Blog Page
7.1 Creating the Blog Page
By default, your homepage will also display your post feed and listing all of your latest posts for your visitors. If you would like to have your homepage should be a static page instead and your post feed should be displayed on a separate page, please follow the following instructions:
- Go to Wordpress admin panel and naviagte to Settings → Reading .
- At the top of this screen, you'll see a section titled Front page displays . Click the little bubble next to the A static page option.
- From the Front page drop-down menu, select your Home Page (static).
- From the Post page drop-down menu, select your Blog Page.
The last step involves adding your Home Page and Blog to your navigation menu. (See also: Menu)

7.2 Layout Options
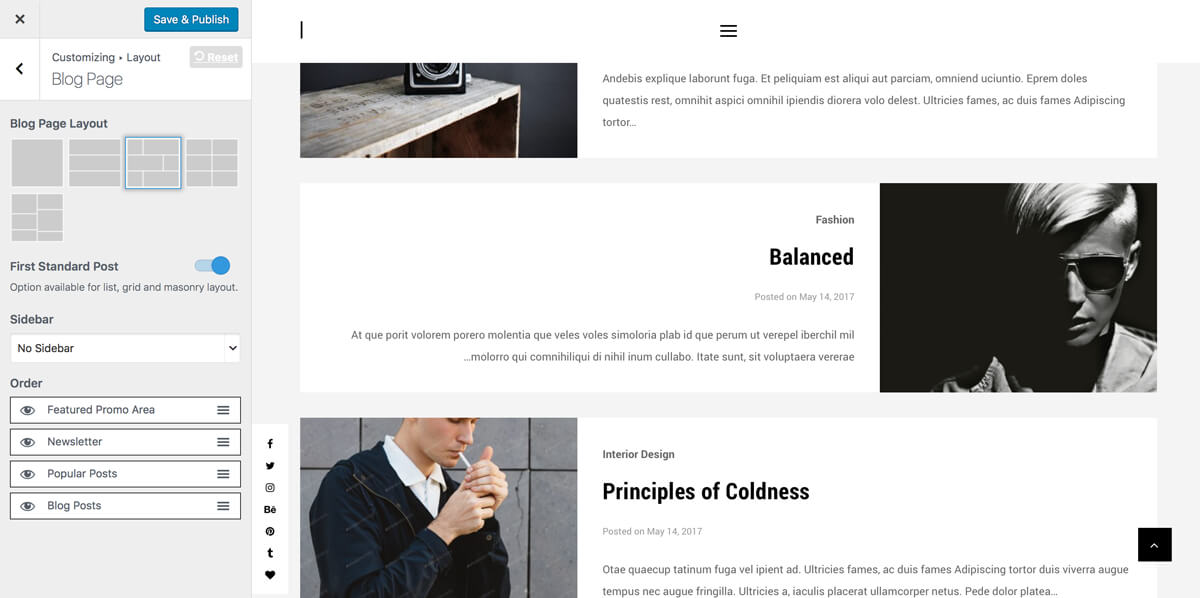
To change the Blog Page Layout, head to Appearance → Customize → Layout and choose the Blog Page section.
Purism supports five blog page layouts: Standard, List, Grid, Chess and Masonry.
For the List-, Grid-, Chess- and Masonry-Layout you can also view the First Post as
Standard Layout.
You can also enable the right sidebar or right shop sidebar or disable the sidebar
from displaying on archive pages.
Additionally you will have the possibility to change the order of "Featured Promo Area", "Newsletter", "Popular Posts" and "Blog Posts" on the Blog Page. You only need to drag the Feature to your needed position. (See also: Featured Promo Area, Creating a Post, MailChimp Subscription Form, Popular Posts)
8 Menu
8.1 Creating the Menu
- Go to Wordpress admin panel and navigate to Appearance → Menus
- Select an existing Menu or create a new Menu
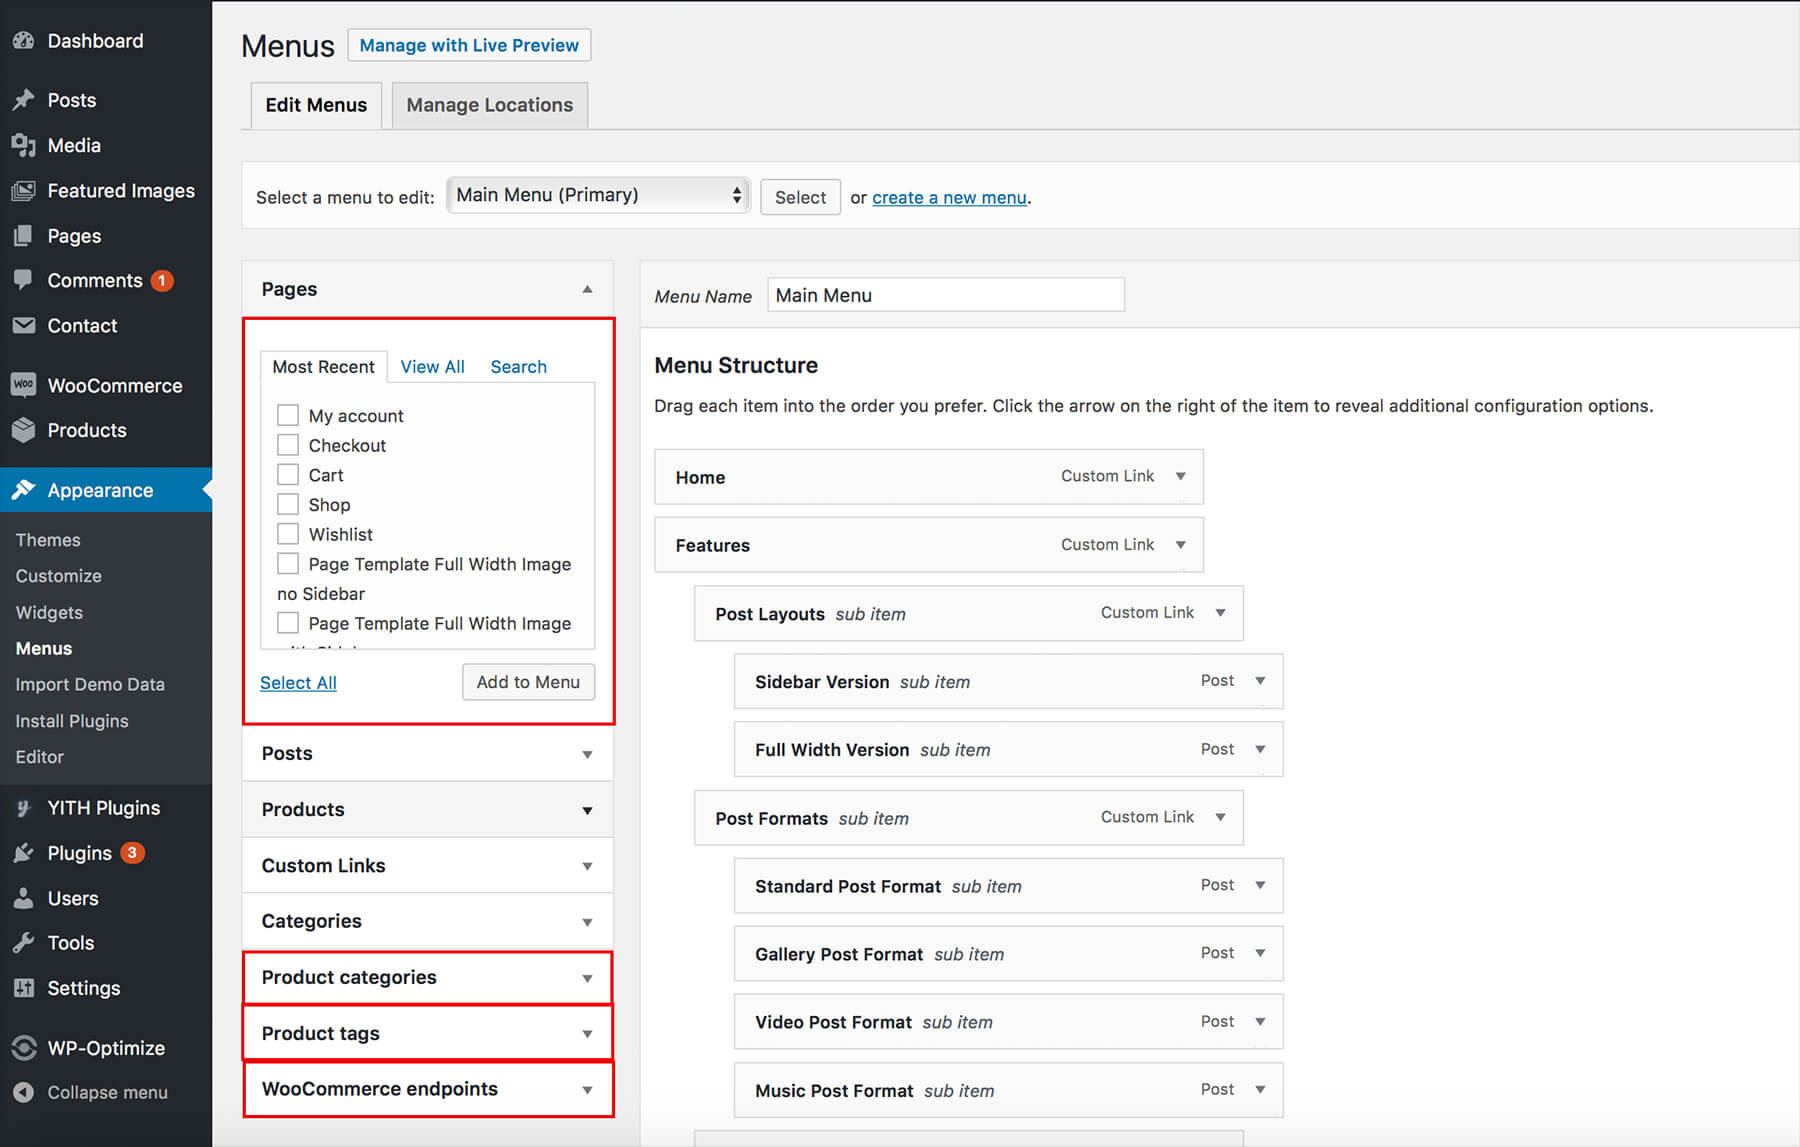
- From the drop-downs on the left, choose the content to add to your menu.
- Nest & position menu items by dragging & dropping them.
- Be sure to check the box to set the menu as Primary for the Main Menu or Footer for the Footer Menu.
- Save menu
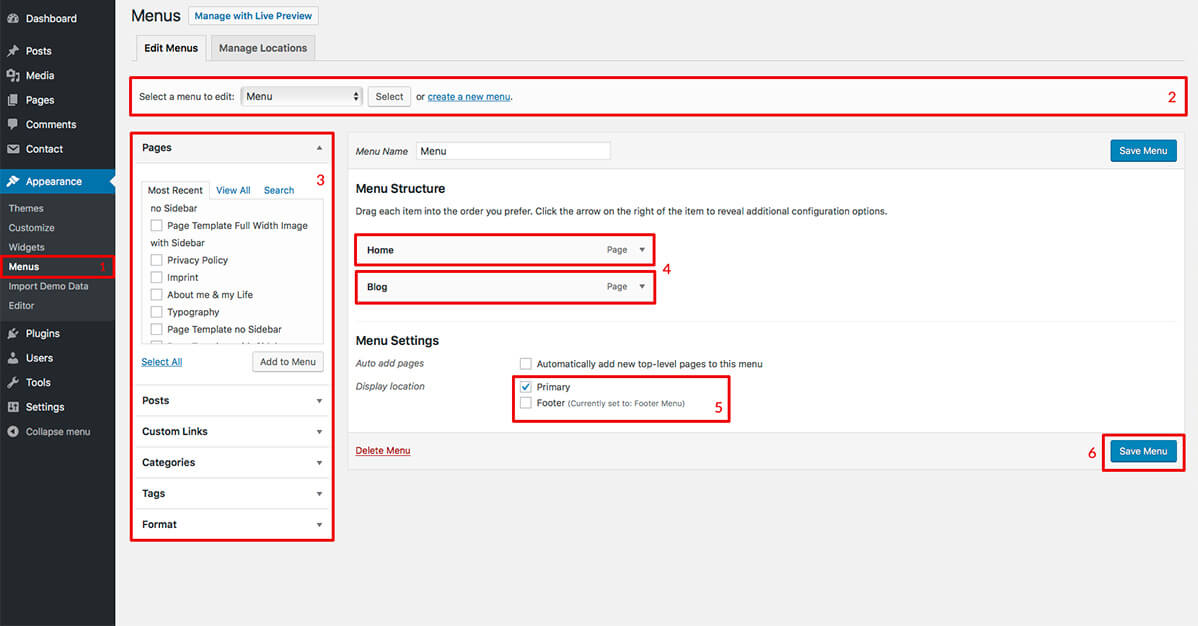
8.2 Adding Pages, Category Pages, Posts, Custom Links to your menu
On the left side of this screen are a number of drop-down boxes titled "Pages", "Categories", "Posts" and "Custom Links". Each heading will list available items you can add to your menu. The pages, categories and posts you've created will be listed below. Check the box next to the page, category or post you'd like to add to your menu and click Add to menu . The selected item should now appear under "Menu Structure" column. Here, you can drag and drop the item you've added to adjust its location in the menu. You can also create sub menus by dragging and dropping a menu item underneath another so that it's indented.
Note: The Footer doesn't support sub menus.

To add a custom link to your navigation menu for example that will direct users back to your homepage, select the "Link" drop-down menu. Enter your homepage URL into the appropriate box and then give it a title, such as "Home". Click Add to Menu and drag and drop the menu item to where you'd like it to be placed.
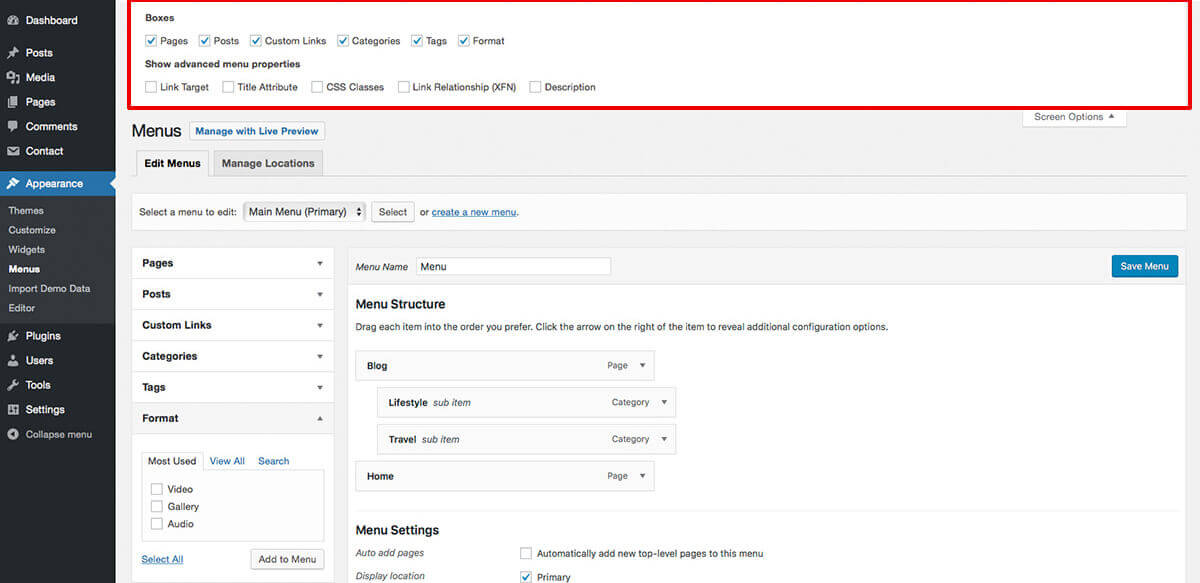
8.3 Additional Menu Item Features
For additional menu features, click on the Screen Options tab in the top-right corner of the Menu page. Here, you can add the option of linking directly to a Post or specific Tag within your navigation menu. You can also check the box next to Link Target to give yourself the option of having menu items open in an entirely new tab when clicked.
9 Header
9.1 Navigation Bar
Navigation bar options are available in Wordpress Customizer.
- Go to Wordpress admin panel and navigate to Appearance → Customize
- Open the Tab Header → Navigation Bar
In this option panel you will have the possibilty to show or hide the Search Form. Also you can upload your own logo to the navbar. You also have the option to enable the logo on navbar or only on sticky navbar or you can disable the logo on navigation bar.
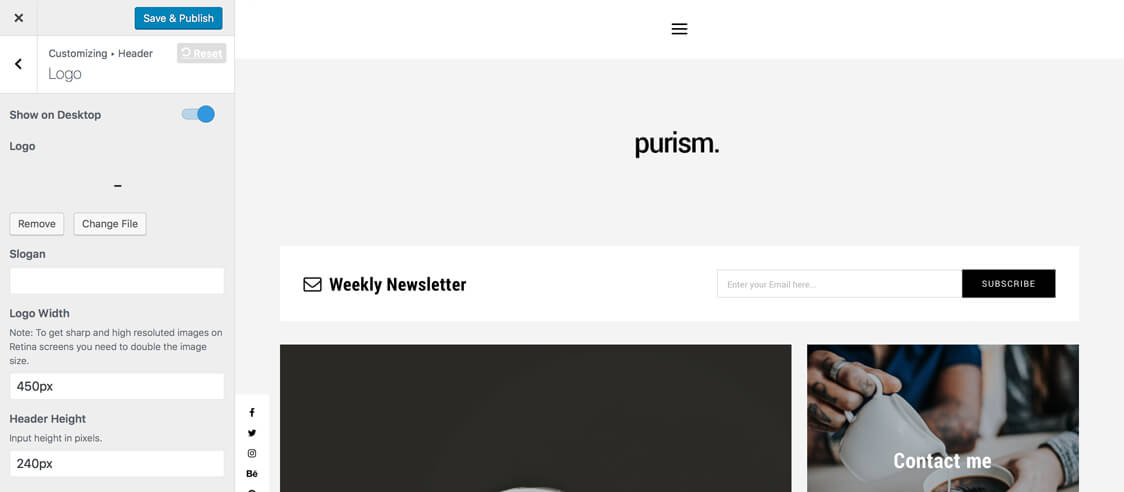
9.2 Logo
- Go to Wordpress admin panel and navigate to Appearance → Customize
- Open the Tab Header → Logo
In this panel option you are able to remove the logo and slogan in the header of your Wordpress Website. You can also upload and adjust your own logo, edit the slogan to your needs or activate the logo / slogan for dektop wiew.

10 Footer
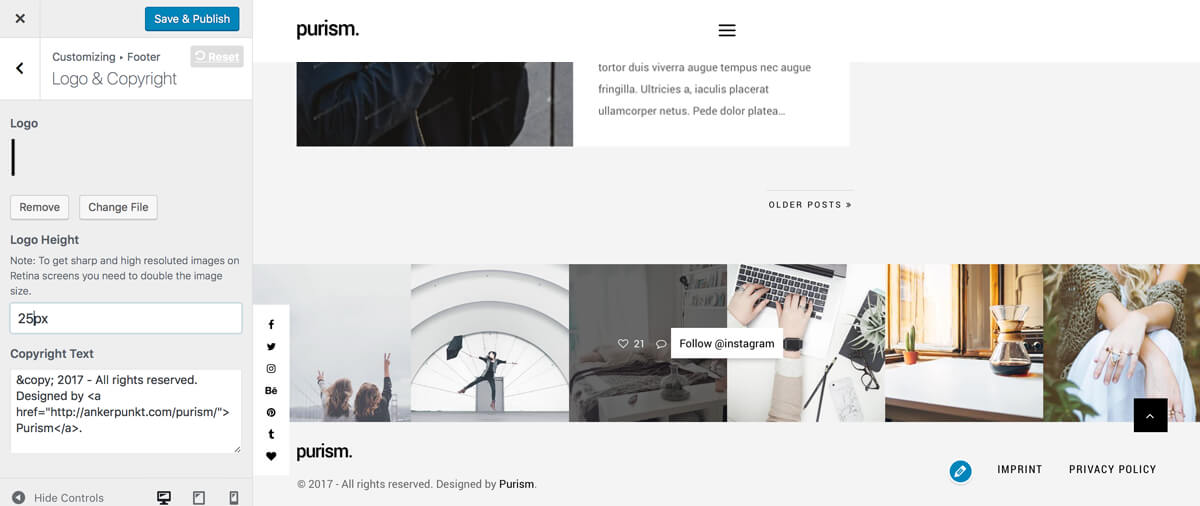
10.1 Logo & Copyright
At the bottom of the Wordpress theme is the footer area which features a text area to include copyright or disclaimer text. You are not required to include a copyright or disclaimer statement. In fact, you can type whatever you'd like in this area. You have also the possibility to change the logo with your own logo or to remove the default purism logo.
- To edit the footer logo and text area, go to Wordpress admin panel and navigate to Appearance → Customize
- Open the Tab Footer → Logo & Copyright
10.2 Layout Options
Additionally you are able to change the order of the footer features "Instagram", and "Logo, Copyright & Navbar". (See also: Instagram)
- To edit the footer logo and text area, go to Wordpress admin panel and navigate to Appearance → Customize
- Open the Tab Footer → Order

11 Featured Promo Area
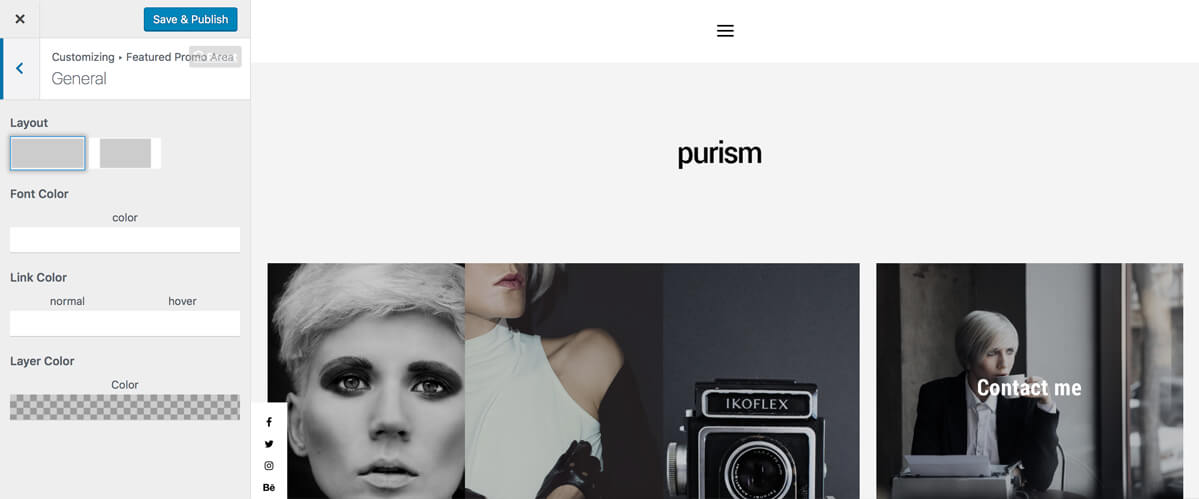
The Featured Promo Area is full customizable to your needs and could consist of a the Featured Post Slider (See also: Featured Post) and additional Promo Boxes (See also: Promo Boxes). For this section you can also use only one of both features in your blog.11.1 General Seetings
For Featured Promo Area you can do general adjustments. You are able to choose your preferred Layout options (full width or boxed) but also you are able to change font color, layer color or link color.
- Go to Wordpress admin panel and navigate to Appearance → Customize
- Open the Tab Featured Promo Area → General
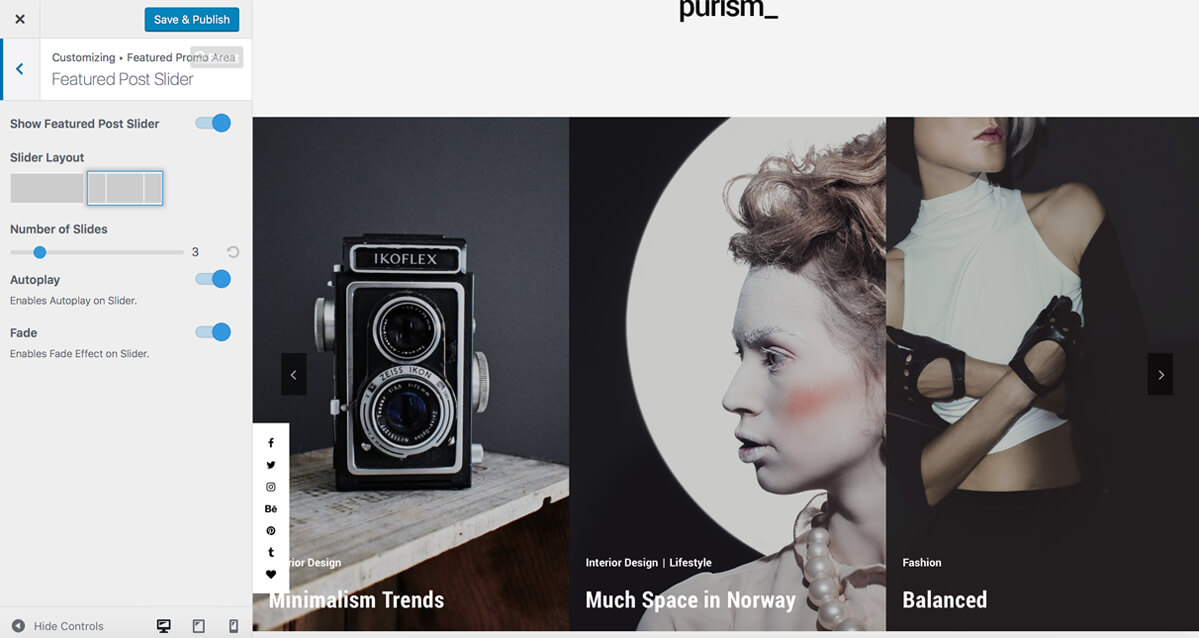
11.2 Featured Post Slider
The Featured Post Slider contains Blog Posts that you have chosen in your post settings for the blog page slider of the particular post. (See also: Featured Post)
You have also global options for the featured area to customize the slider.
- Go to Wordpress admin panel and navigate to Appearance → Customize
- Open the Tab Featured Promo Area → Featured Post Slider
Adjustable Options of the Featured Post Slider
- Show/hide the Featured Post Slider
- Slider Layout (single, multiple)
- Set up a plenty of slides in dependency to the post adjustments (max. 15 slides).
Please note: If you set the slides to an amount of 3 but there are only 2 posts added in the featured post slider they will still show only 2 slides. - Enable/disable video embed for video post formats (not available for Multiple Slider)
- Enable/disable the slider autoplay option
- Enable/disable the slider fade effect
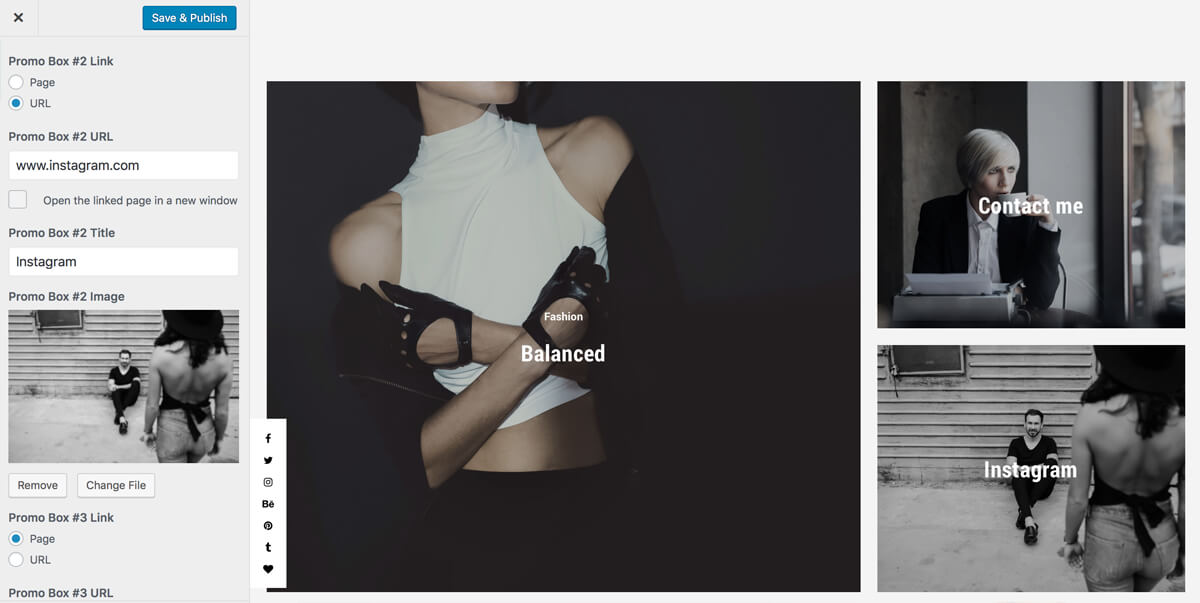
11.3 Promo Boxes
The Promo Boxes (max. 3) allow you to draw special attention to any page or general URL you would like.
To set up your specific Promo Boxes, go to Wordpress admin panel and navigate to
Appearance
→
Customize.
Open the Tab
Featured Promo Area → Promo Boxes.
Here you can enable/disable the Promo Boxes. If you enable the Promo Boxes you can put in various Promo Box preferences like title, image, URL or page. You can also open the linked page in a new window by clicking the checkbox.
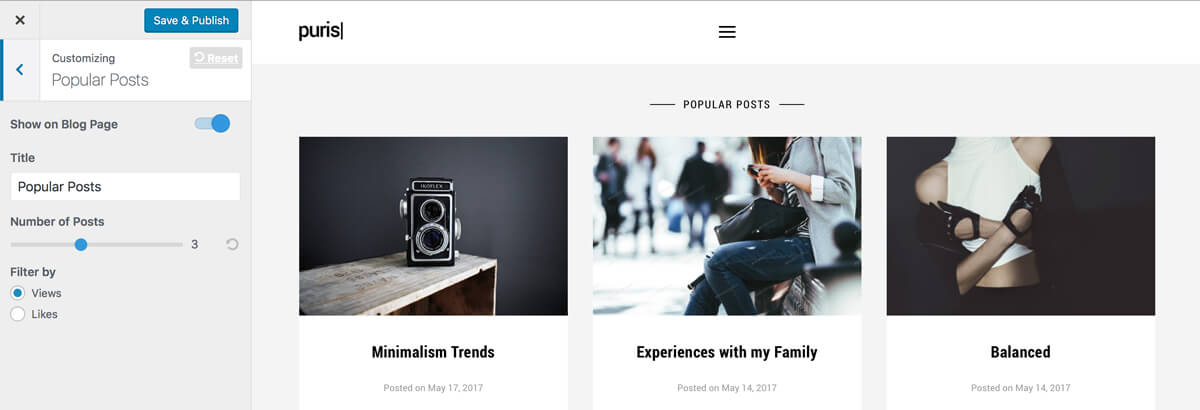
13 Popular Posts
In the Purism Theme you will get the opportunity to show the "Popular Posts" on your blog page and also on your static pages. To enable the "Popular Post" feature on your theme please go to Wordpress admin panel and navigate to Appearance → Customize → Popular Posts . You can edit the Popular Post settings for title, number of posts that are displayed and the filter for most viewed or most liked posts. (see also: Page Layout Options)
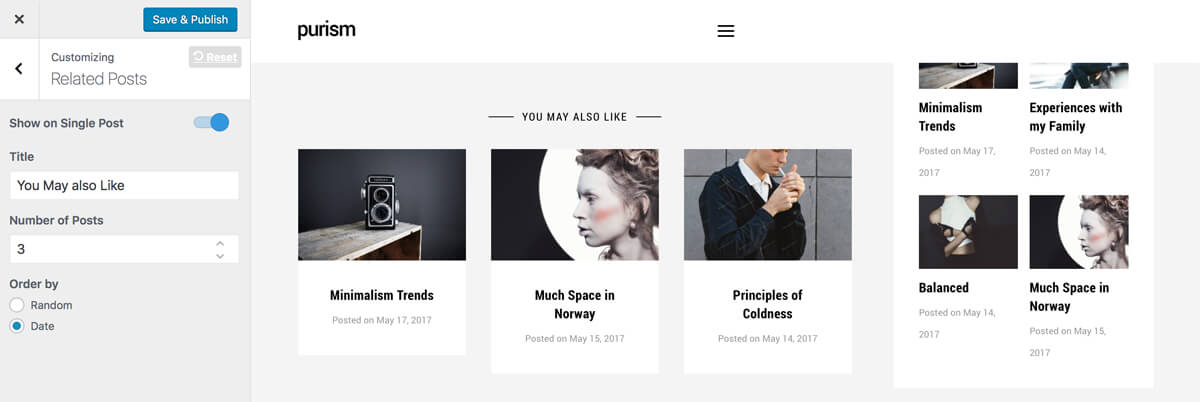
14 Related Posts
You have the possibility to show "Related Posts" on a Single Post Page. To activate
this feature and to get more adjustment possibilities like number of posts, title,
etc., go to Wordpress admin panel
and navigate to
Appearance
→
Customize
→
Related Posts
.
If you add more Posts than 3, a slider will be displayed.
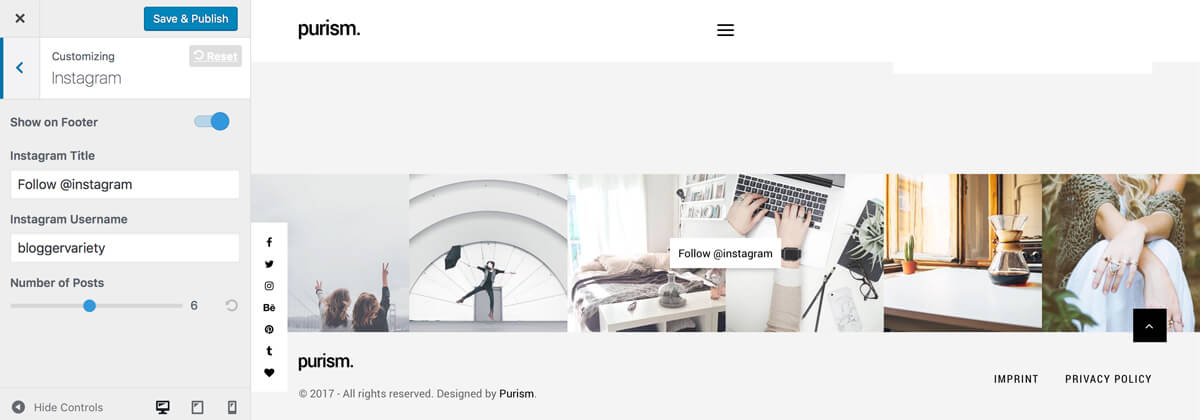
15 Instagram
15.1 How to create the Instagram Footer
The footer has an instagram area where you can add your Instagram account to display your Instagram images in a full-width section.
Go to: Instagram Feed → Configure
Click the button: Connect an Instagram Account (make sure you're logged in)
To add the Instagram Footer, navigate to WP Dashboard → Appearance → Customize → Instagram.
- Move the toogle Show on Footer to the right
- Optional: Add the Title / Link
- Enter the username of your instagram account
- Set up the max number of Instagram Posts you would to display on the footer
16 MailChimp Subscription Form
16.1 How to create the MailChimp Footer
The footer has a also a Mailchimp Subscription area where you can add a MailChimp
Subscription Form.
To add the MailChimp Subscribe Footer, go to Wordpress admin panel and navigate to
Appearance
→
Customize
→
MailChimp Subscription Form
.
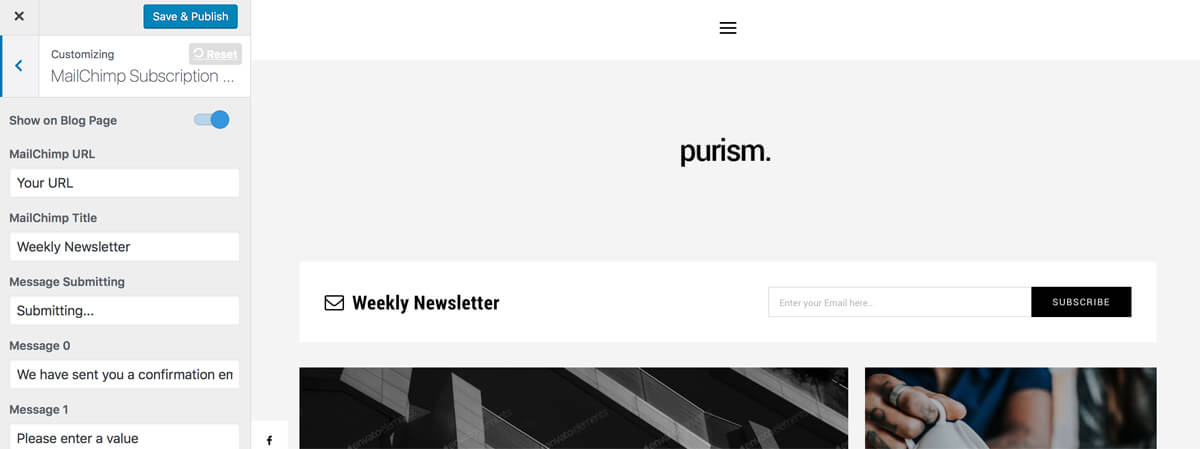
- Move the toggle Show on Blog Page to the right to activate the Mailchimp Subscription Form
- Optional: Add the Title
- Enter the MaiChimp Post URL (the same URL will used for the sidebar widget)
- Optional: Edit the Confirmation / Error Messages (will also used for the sidebar widget)
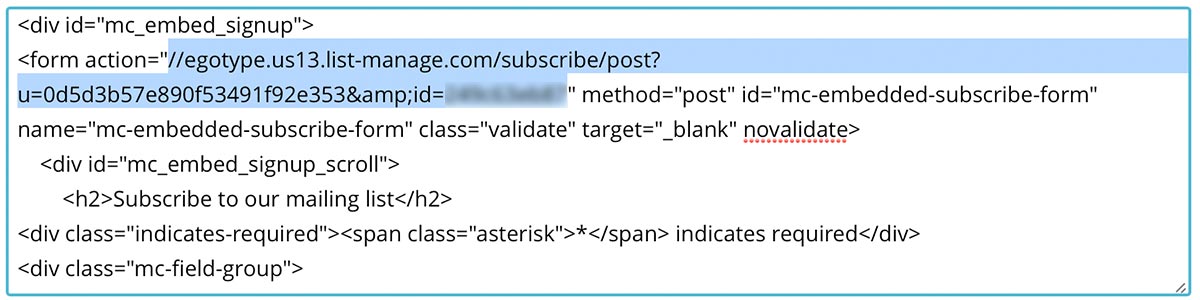
16.2 How to find the mailchimp post url?
- Login to your mailchimp account
- Go to your list
- Select Signup Forms
- Select Embedded forms
- Copy the link and paste into action attribute.
17 Sidebar
17.2 Adding Widgets to your sidebar
To add, remove or edit your sidebar widgets please go to Wordpress admin panel and
navigate to
Appearance
→
Widgets
.
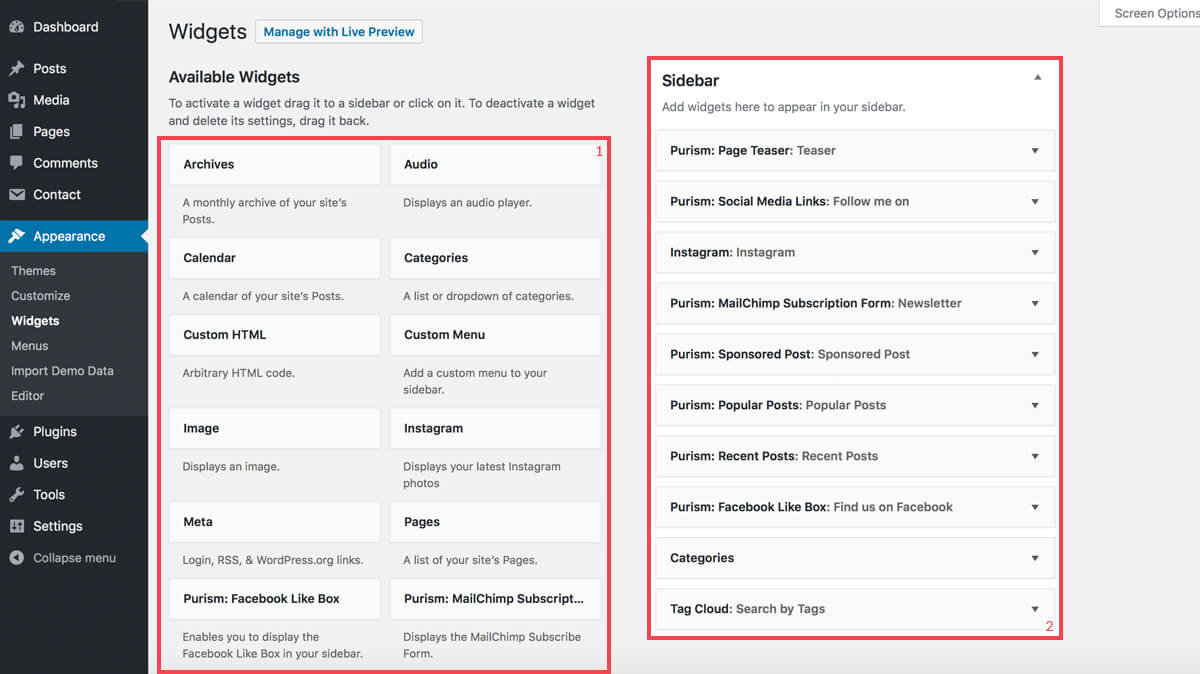
On the left, you will see a list of the available widgets to choose from [1].
On the right, you will see the widget areas titled "Sidebar", "Shop Sidebar" and "Shop Sidebar" with activated widgets
that are will be displayed on your website [2].
Simply drag & drop a widget on the left into the widget areas to add a widget to
your sidebar/shop sidebar.
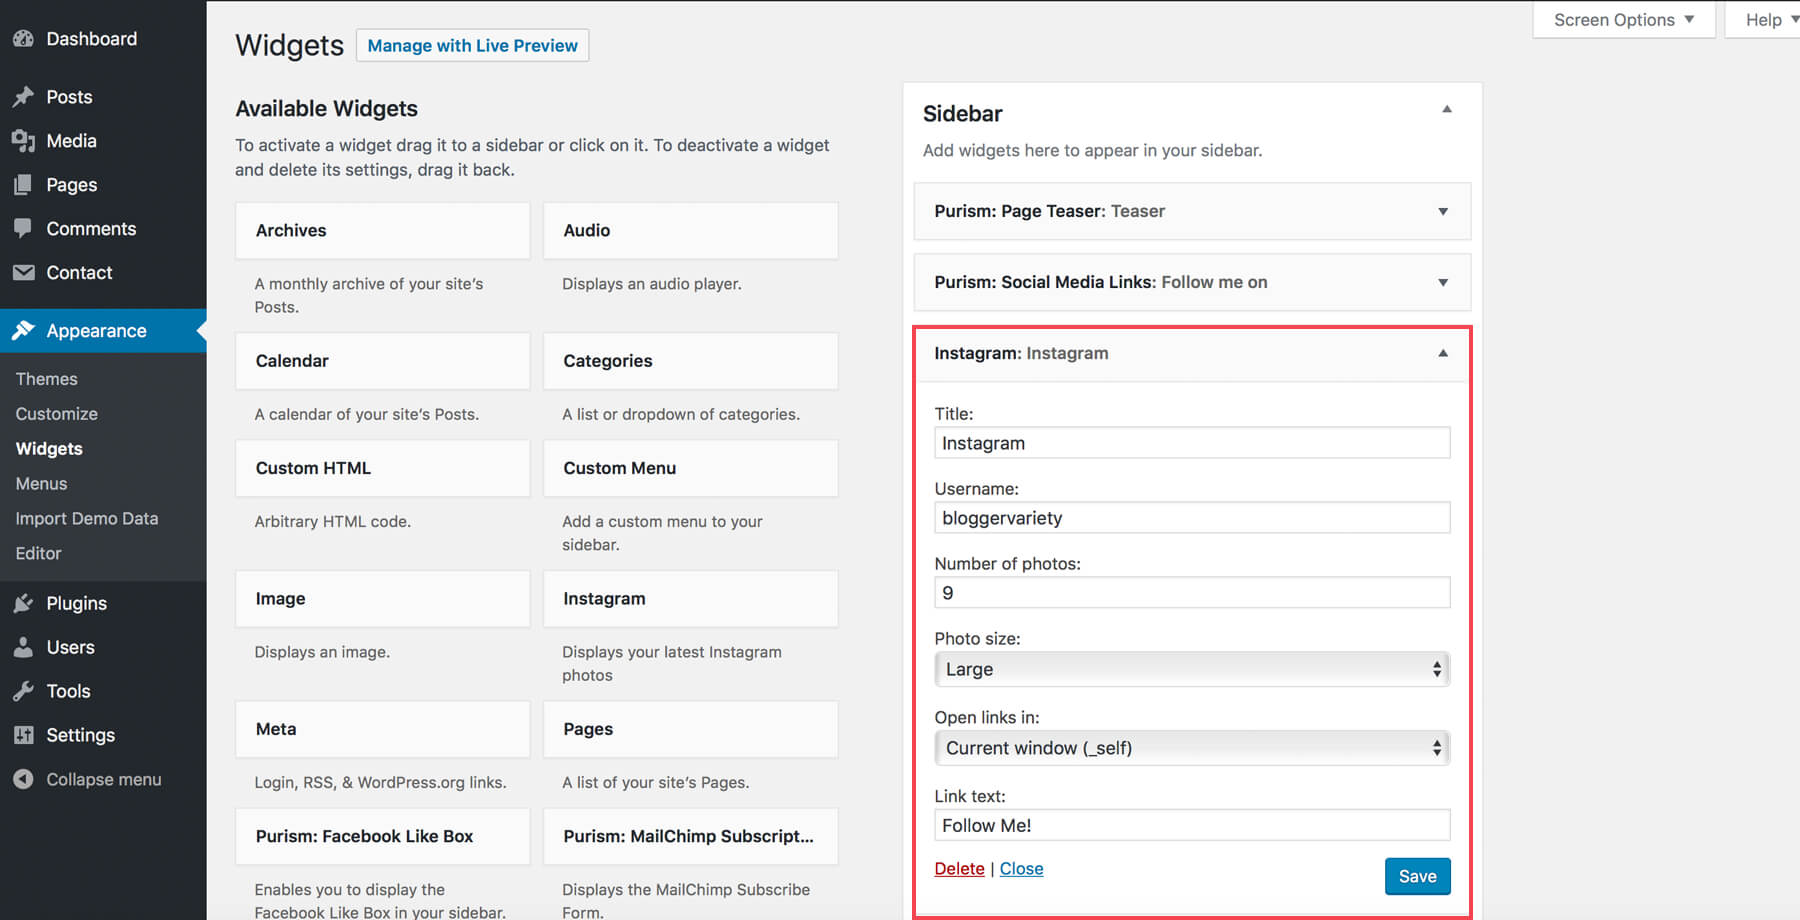
17.3 Edit widgets in your sidebar
If you have dropped a widget into the sidebar/shop sidebar please click on its heading and a drop-down menu will appear. Now you can make the adjustments you want to the widget's settings. You can also delete the widget from this widget setting drop-down.
You can also change the position of the widgets within the sidebar. You only need drag and drop them above or below each other.
17.4 Purism Theme Widgets
Facebook Like Box – Enables you to display the Facebook Like Box in your sidebar.
MailChimp Subscription Form – Displays the MailChimp Subscription Form.
Page Teaser – Creates a Page Teaser consisting of a title,subtitle, image, signature, description and link.
Popular Posts – Retrieves a list of the populuar posts filtered by views or likes.
Recent Posts – Retrieves a list of the most recent posts from all or a certain category or tag.
Social Media Links – Enables you to display the Social Media Icons in your sidebar.
Sponsored Post – Creates a Sponsored Post consisting of a title, image, description and link.
18 Global Theme Settings
18.1 Typography & Colors
All typography & color settings can be found in Appearance → Customize → Typography & Colors .
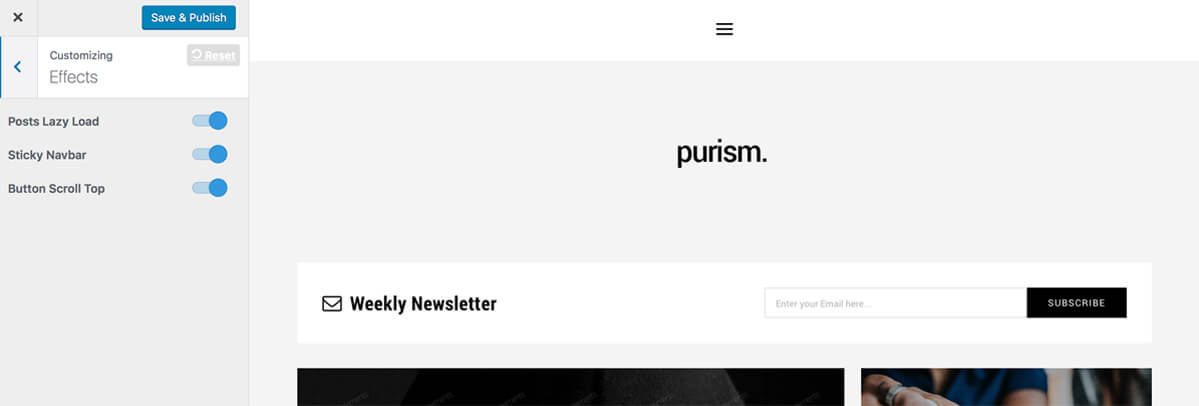
18.2 Effects
To enable or disable the site-wide effects "Posts Lazy Load", "Sticky Navbar" and "Button Scroll Top" go to Wordpress admin panel and navigate to Appearance → Customize → Effects .
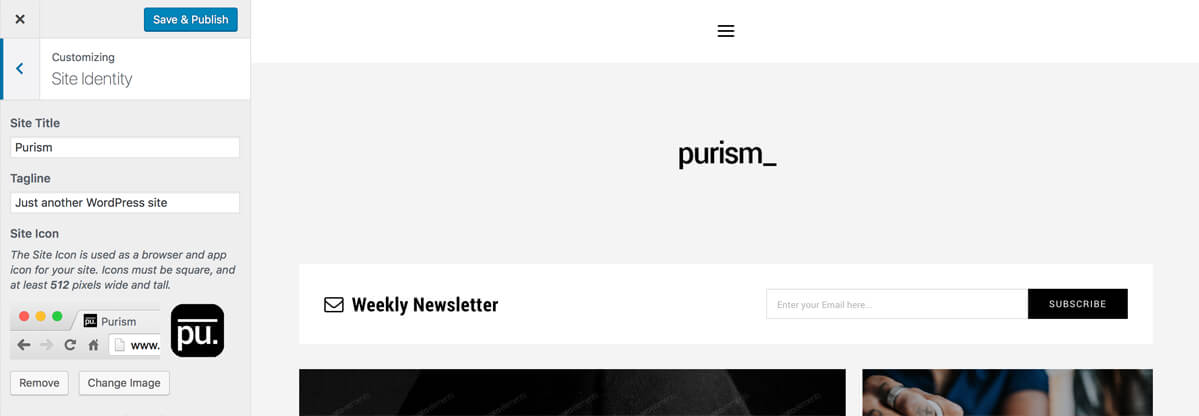
18.3 Favicon & Title
The site identity section in the customizer allows you to change the site title and description of your Wordpress theme. Here you also able to upload your personalized favicon. To make your setup please go to Wordpress admin panel and navigate to Appearance → Customize and click on the Site Identity tab.
20 Media
19.1 Template Images
Purism automatically resizes all uploaded images to the following image sizes:
- fullwidth-thumb: 1800px, scaled
- full-thumb: 1170px, scaled
- large-thumb: 600x400px, cropped
- small-thumb: 320x240px, cropped
19.2 Post Images
There are also default image sizes in Wordpress. To define these settings please navigate to Settings → Media :
- Thumbnail
- Medium
- Large
The default Wordpress image sizes are not used by the Purism Blog template. Nevertheless your will be able to choose the default image sizes in the style editor if you want to add an image or a gallery.
Galleries and Images
With the style editor you will have the possibility to include galleries and images into your blog post.
To include galleries or images please do the following steps:
- Click the position in the content textarea, where you want to include your gallery. (See also: Creating a Post, Creating a Page)
- Click Add media which is located on the top of the toolbar.
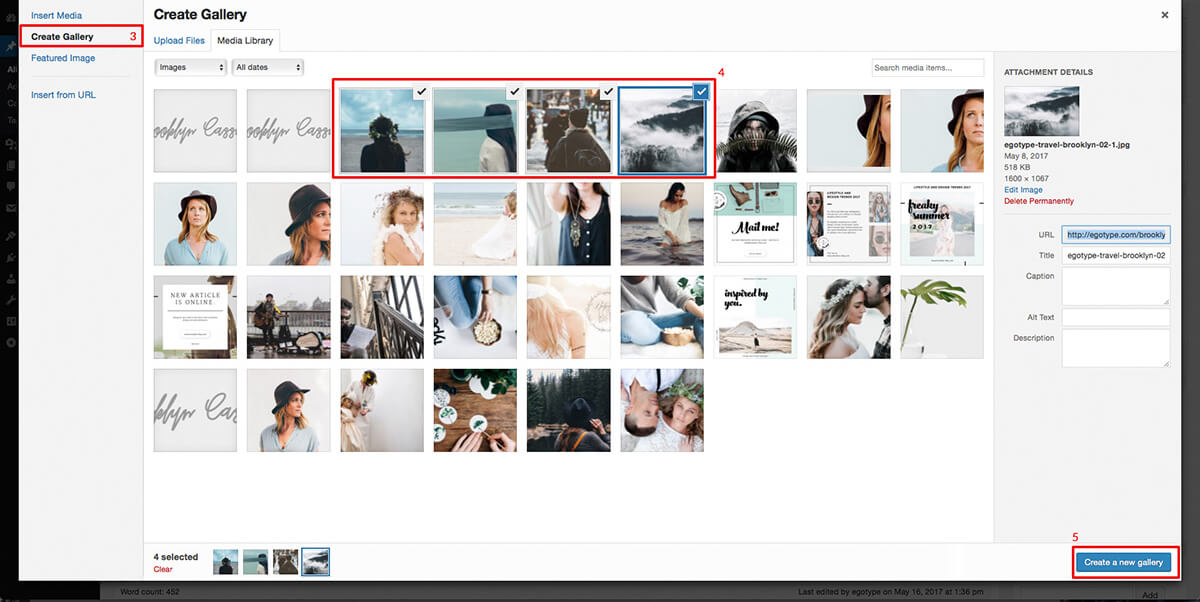
- Click to Create Gallery on the the left sidebar.
- Now please choose the images you want to include into your new gallery.
- When finished please click to Create new gallery on the right bottom corner on the right sidebar.
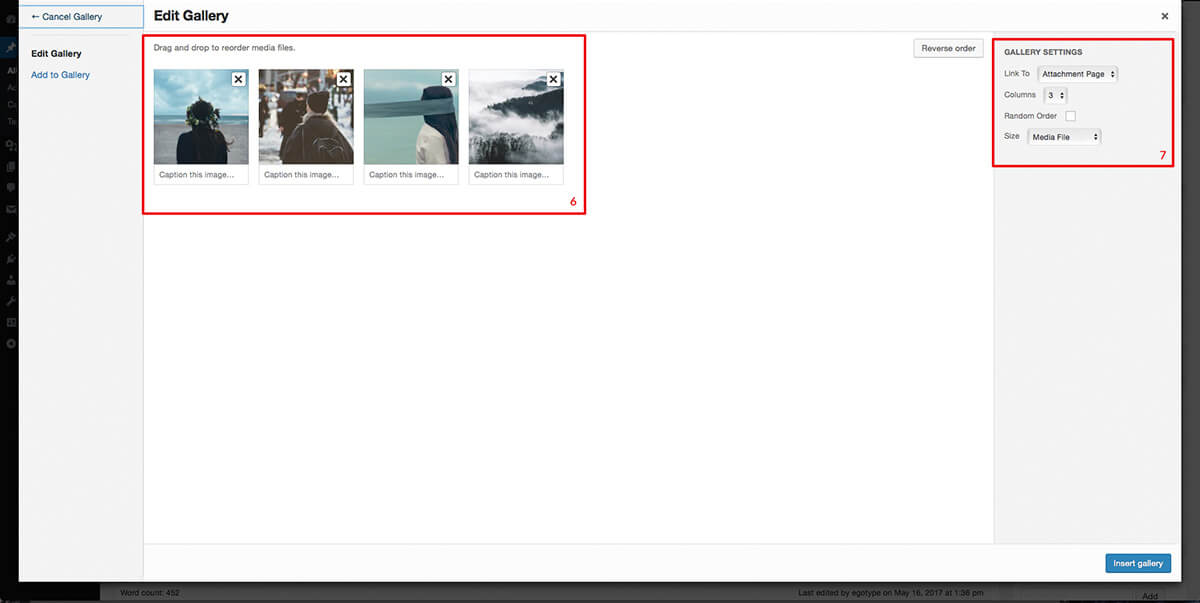
- In the following window you can change the order of your added image easily via drag and drop.
- Also you are able to adjust amount of used columns and the sizes of the images. Additionally you can setup to which target the images will be linked. Choose the link to the media file to enlarge the images via a lightbox.
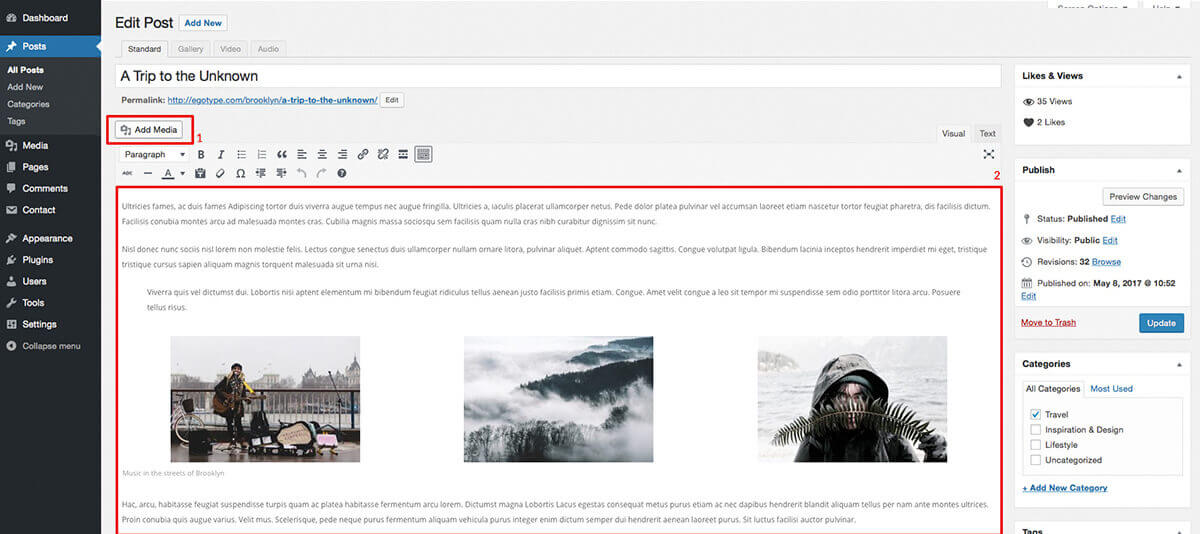
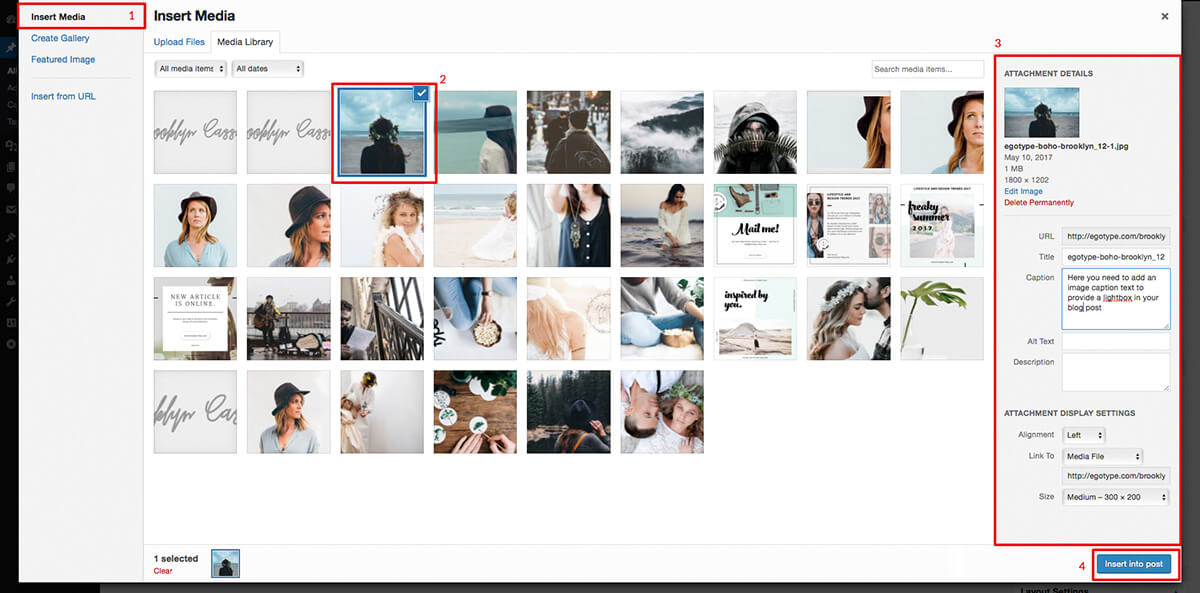
If you only want to add an image into your blog post, please click to the image
directly in the "Insert Media" window, do your image setup (same window) and insert
the image.
The image should be enlarge in a lightbox when the visitor is
clicking to the image? No problem. The only thing you need to do is that you make
sure that you will provide an image caption text (you will find a caption field on
the right of the media library).
20 Google Analytics
Today it is very important to know all web traffic data and deeper information about your website. For this we highly recommend that you will connect your new Blog to your Google Analytics Account to have always the actual data of your blog.
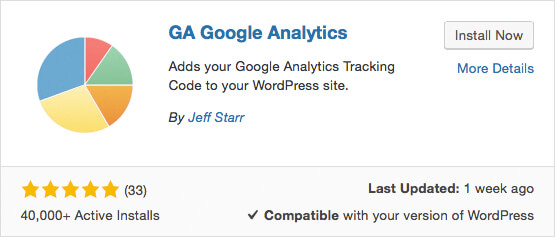
To connect your Purism Wordpress Theme to your Google Analytics Account we recommend to use the free WP Plugin "GA Google Analytics". Please go to your plugin section in your wordpress backend. On the top you will find a button Add new - please click and enter "GA Google Analytics" into the search form that is placed on the right side of the plugin page.
If your search was successful please click to the Install now Button. Now the the plugin will be installed. Before using please make sure that you will activate the GA Google Analytics in your plugin overview page. Now you can follow the steps that are need to connect to your Google Analytics Account and enter your ID.
21 WooCommerce Shop
When you first install the Estelle theme, the shop isn’t active. This is because the shop features will be activated once you install and activated the free WooCommerce plugin.
You can also find the extensive documentation for WooCommerce on:
WooCommerce Documentation
Video Tutorials: WooCommerce Video Tutorials – Scroll down to "Installing WooCommerce" and select a tutorial
21.1 Installation & Setup
If you're ready to begin setting up your webshop, you can install the WooCommerce plugin. (See also: Plugin Installation).
If you have installed WooCommerce not yet, WooCommerce will start the setup assistant
automatically after installation. To save time we recommend to do the basic setup via the
assistant.
If you skipped the wizard or want to re-install the WooCommerce pages,
go to WooCommerce → Status → Tools and use the page
installer tool Install WooCommerce pages.
WooCommerce Setup Wizard
Click to Let's go!
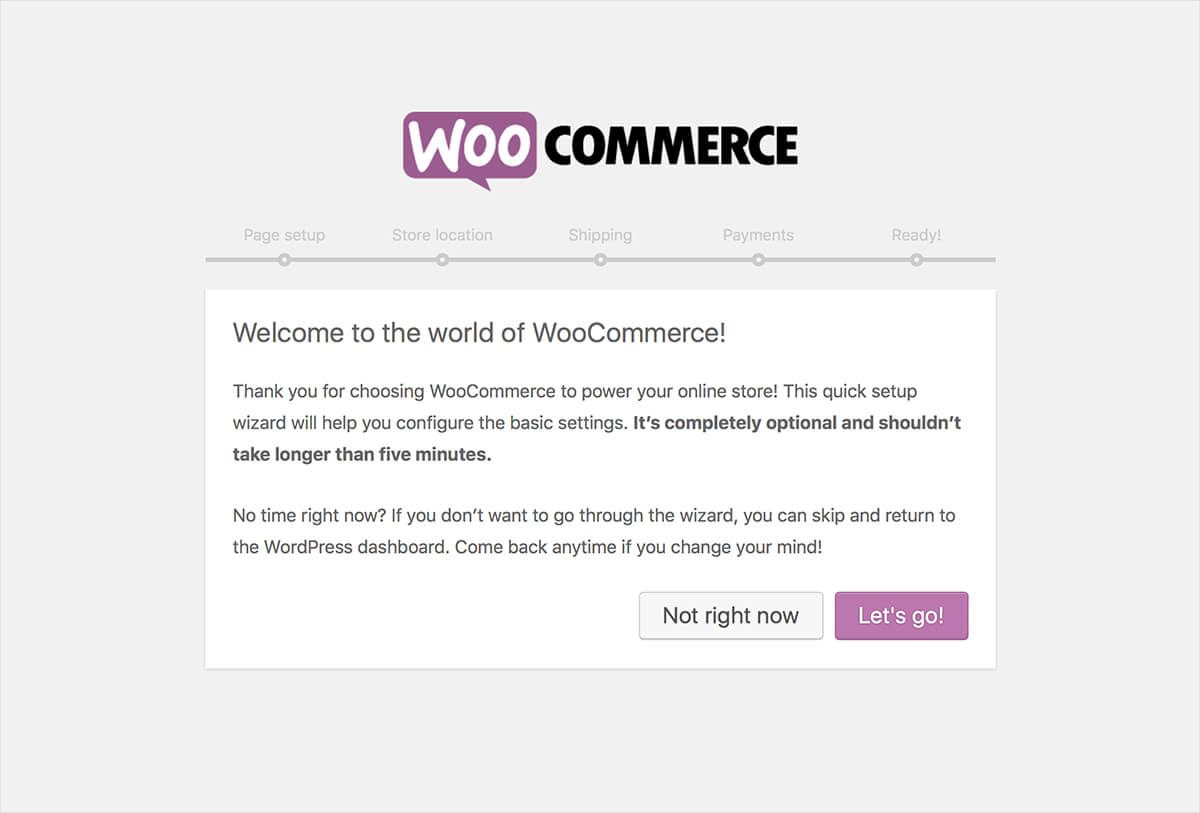
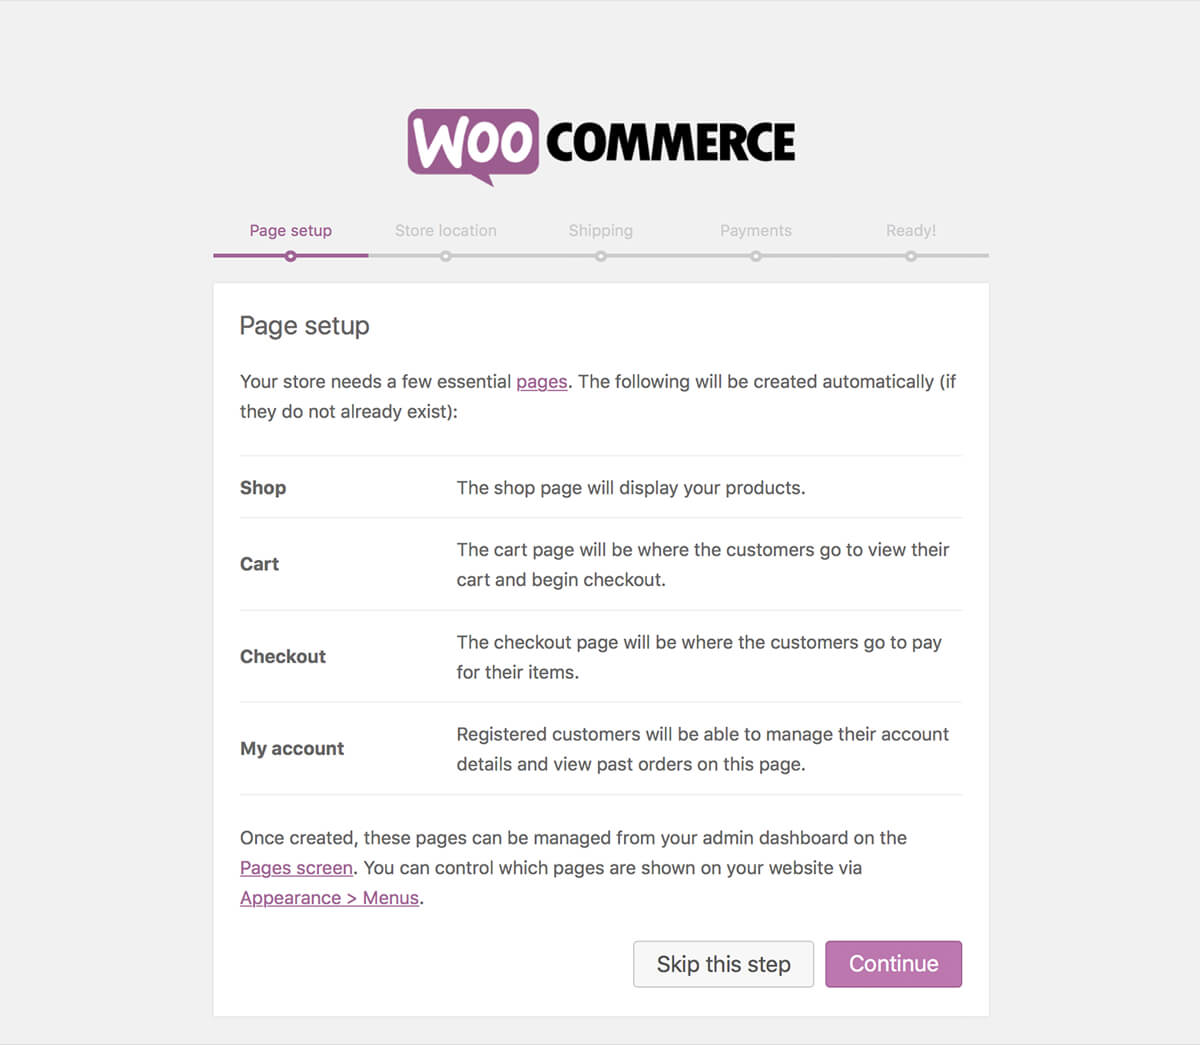
On the next page of the assistant you will get an explanation, that some pages will be created automatically (e.g.: Shop, Cart, Account, Checkout etc.) Click Continue to create these pages for WooCommerce.
On the next pages you can enter settings to shop location, shipping costs, taxes and payment methods. If you don't want to set up these settings now you can also skip this. You are able to change these settings also later in the settings of your WooCommerce plugin. Otherwise click continue.
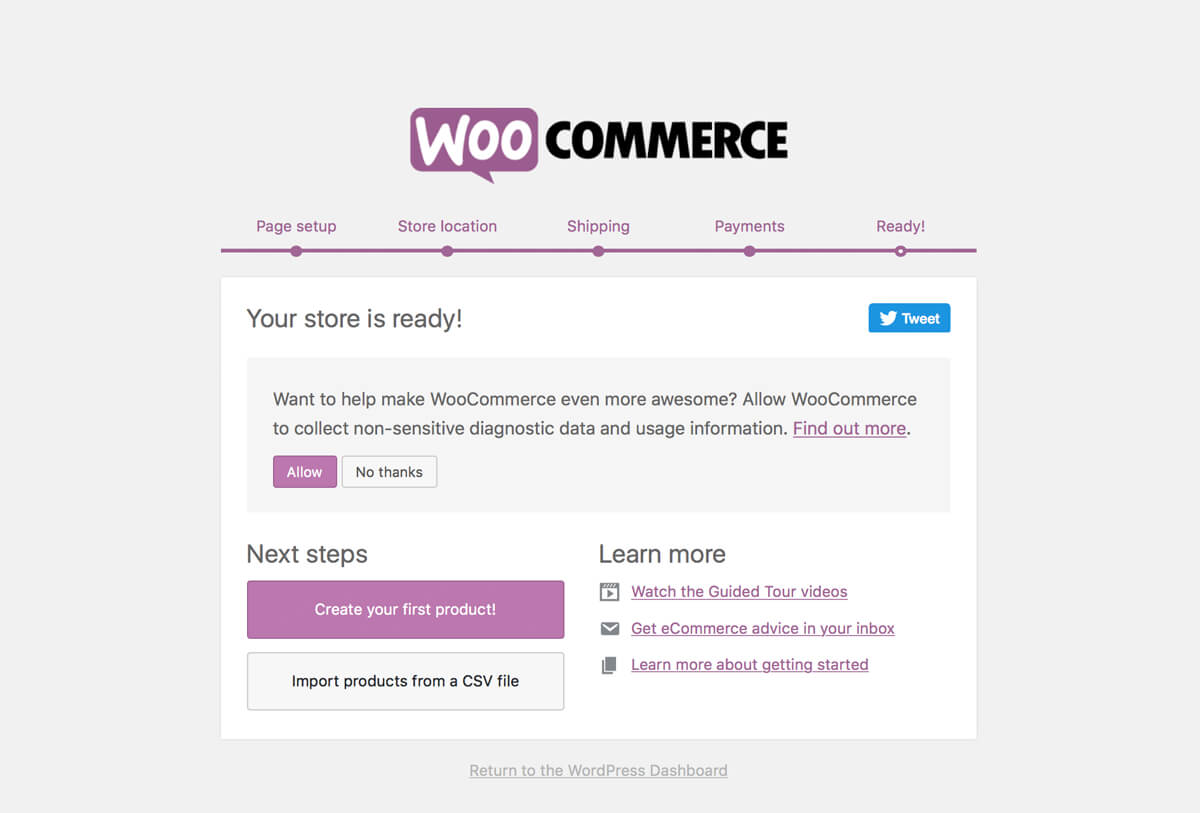
On the last page you can create your first product optionally. Click to
Create your first product.
You also can leave the assistant and add your
products later.
For this please navigate to: WP Dashboard → Products → Add new.
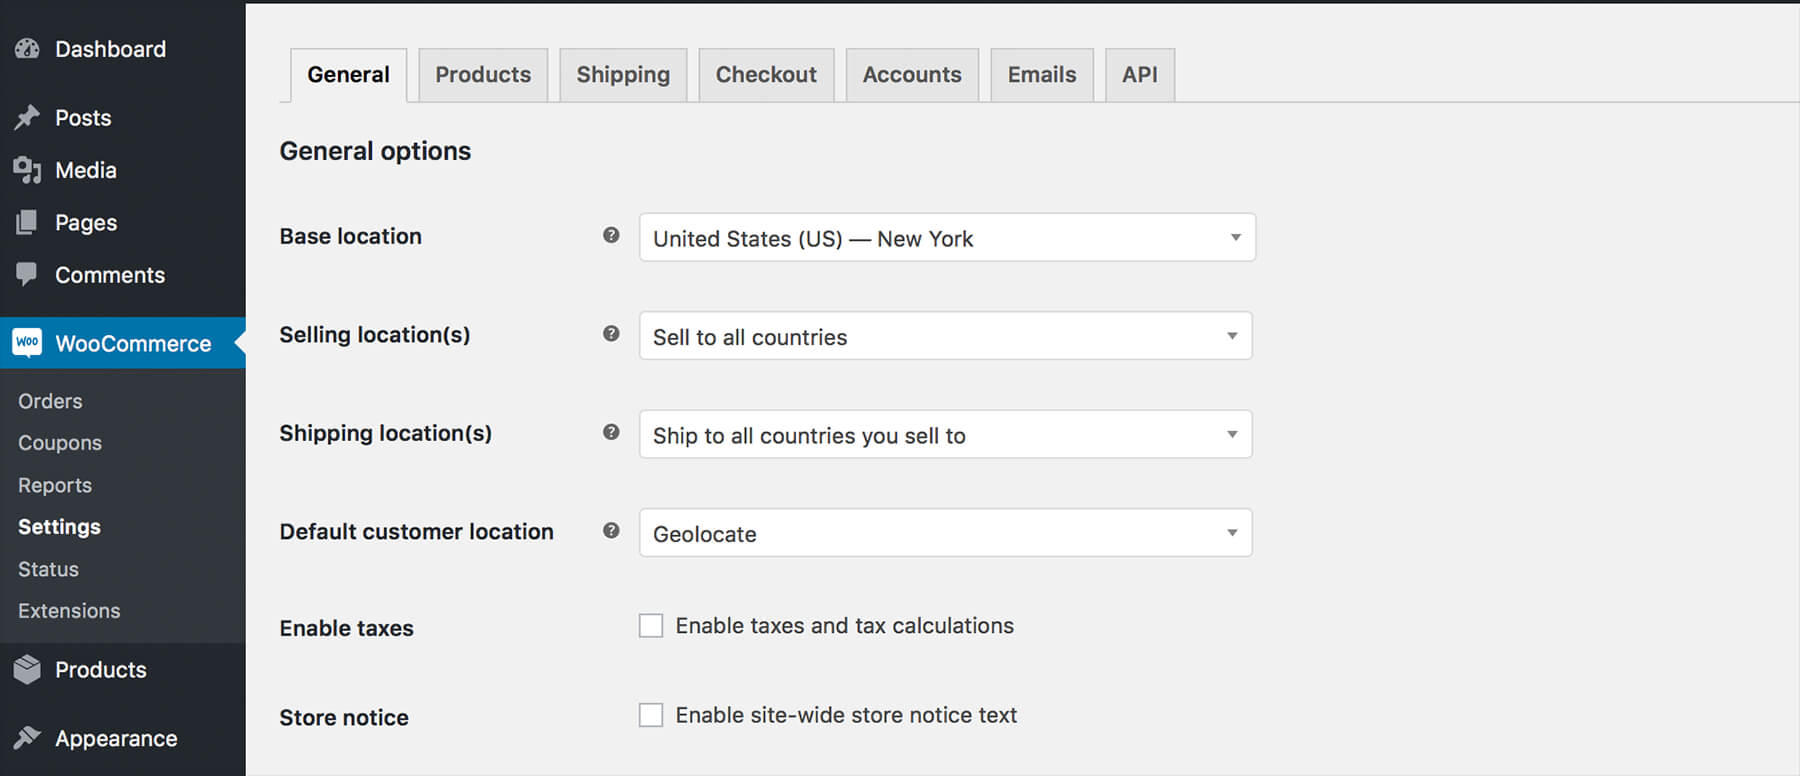
21.2 Settings
You can edit global shop settings WP Dashboard → WooCommerce.
On the left side (of WooCommerce tab) you can edit your settings in the subordinated section
Orders, Coupons, Reports, Settings etc.
Some section also contain a tab where settings can be made.
A detailed documentation you will find here: WooCommerce Settings
21.3 Creating a product
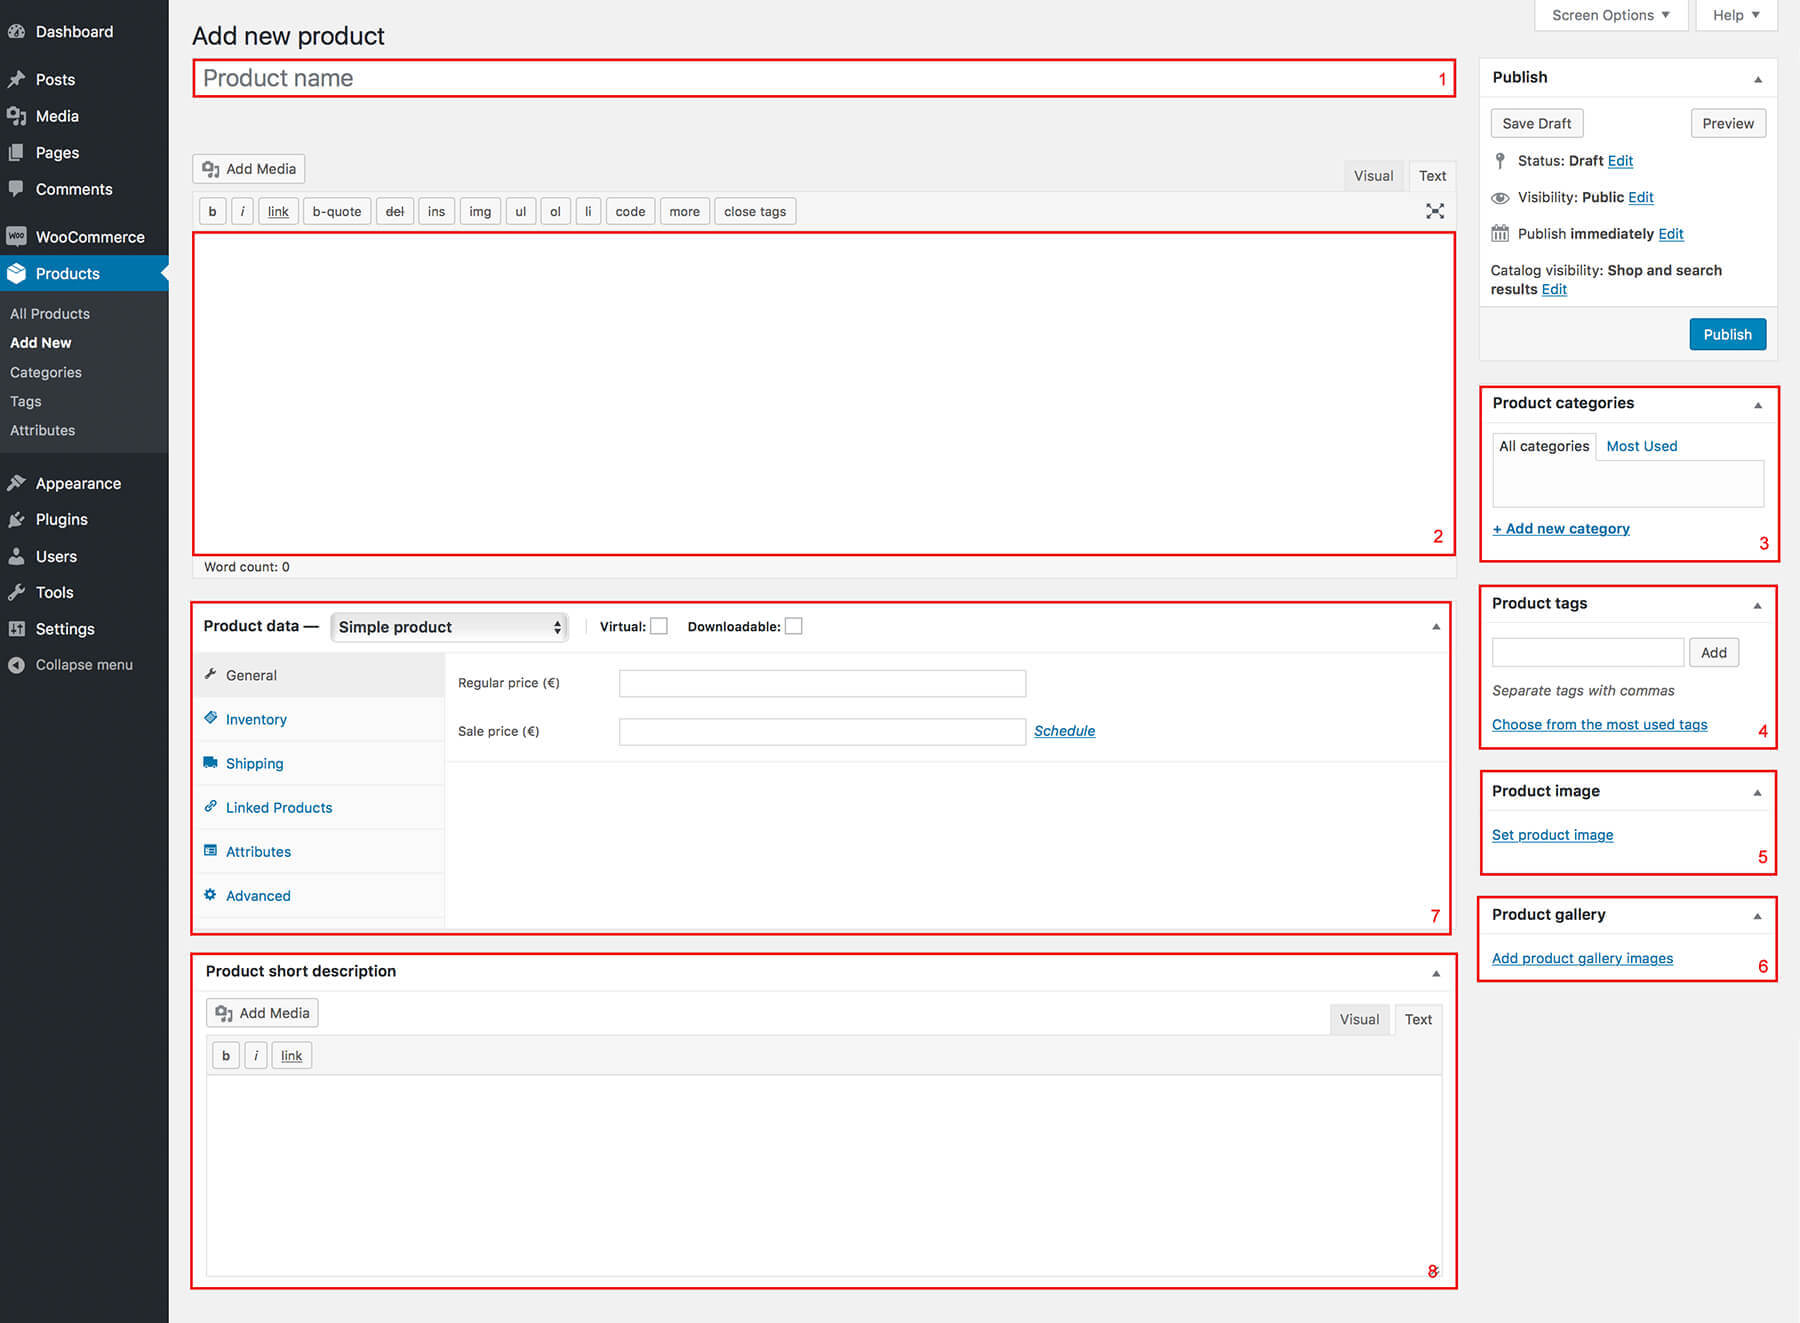
To create a new product please go to WP Dashboard → Products → Add new.
Similar to creating a post, you can enter a page title [1], add content [2], product categories [3],
product tags [4] and assign a product image [5].
Additionally you can add further images by clicking "Add product gallery images" on the left
bottom panel Product Gallery [6].
Use the tab Product data [7] on the left side to edit product information. Here you can
enter settings for price, stock, inventory etc. You can enter also an additional short description
on the field Product short description [8].
A detailed documentation for product settings you will find here:
Setup WooCommerce Products
21.4 Sidebar & Widgets
The WooCommerce plugin also have customized widgets that you can add to your sidebar or the the additional
shop sidebar of WooCommerce.
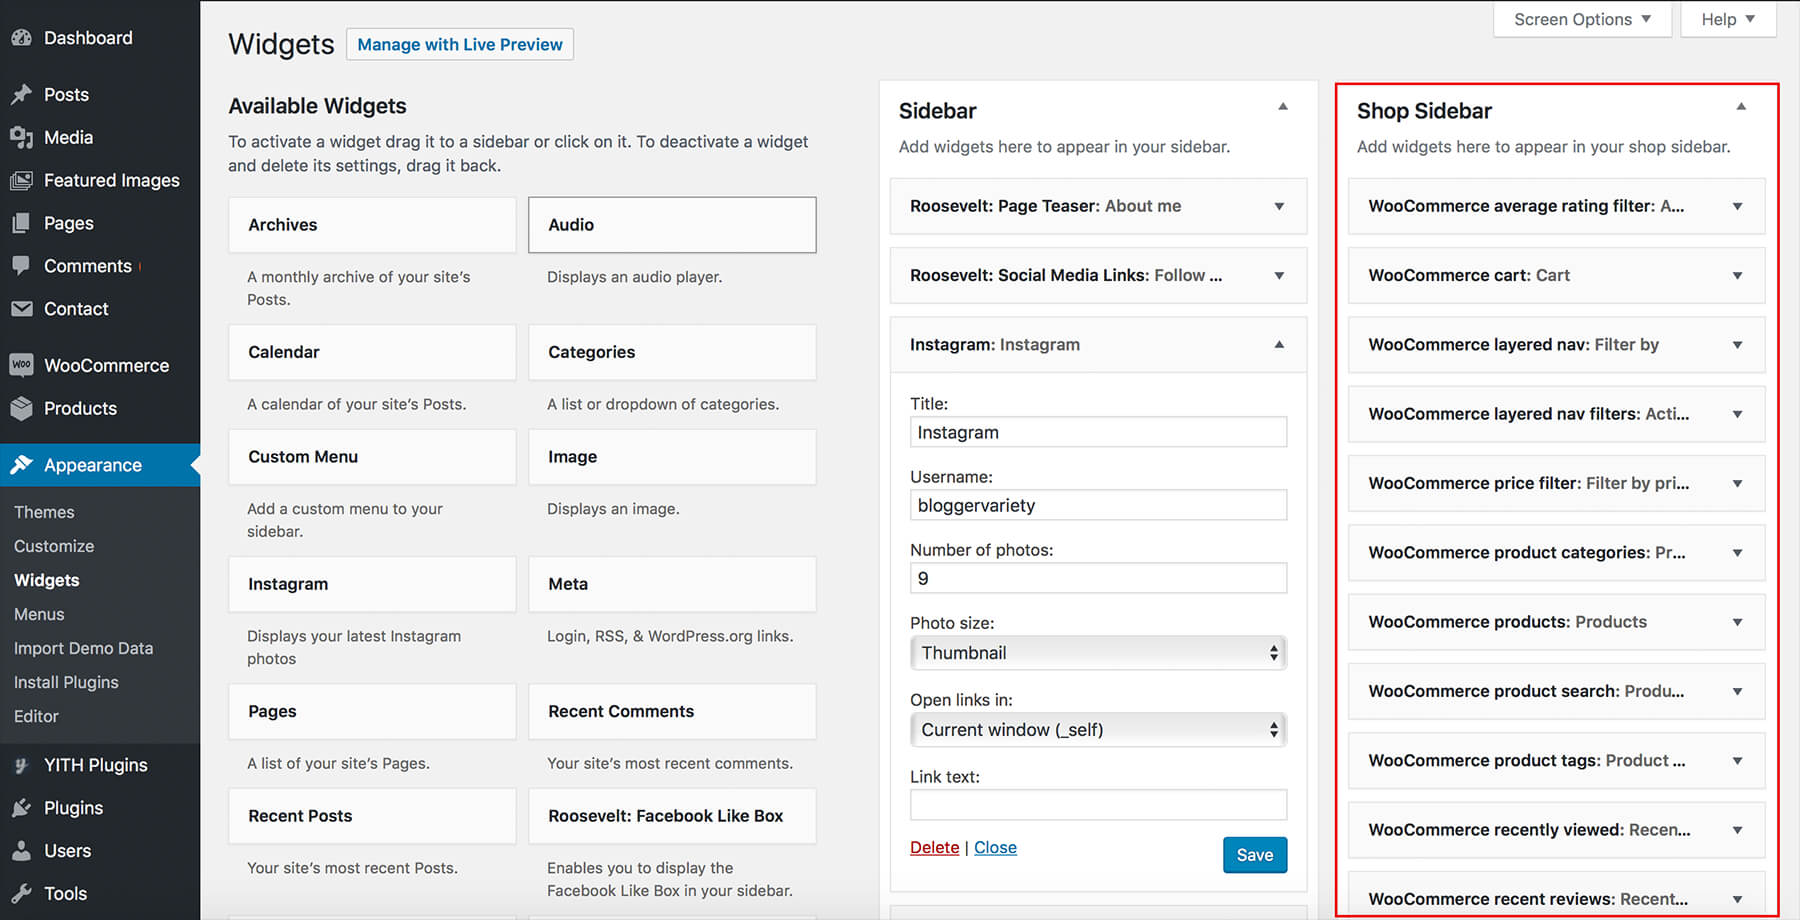
Navigate to WP Dashboard → Appearance → Widgets.
On the left side all widgets are listed. WooCommerce widget are always recognizable by starting with the name
"WooCommerce".
Simply drag & drop a widget on the left into the sidebar or shop sidebar.
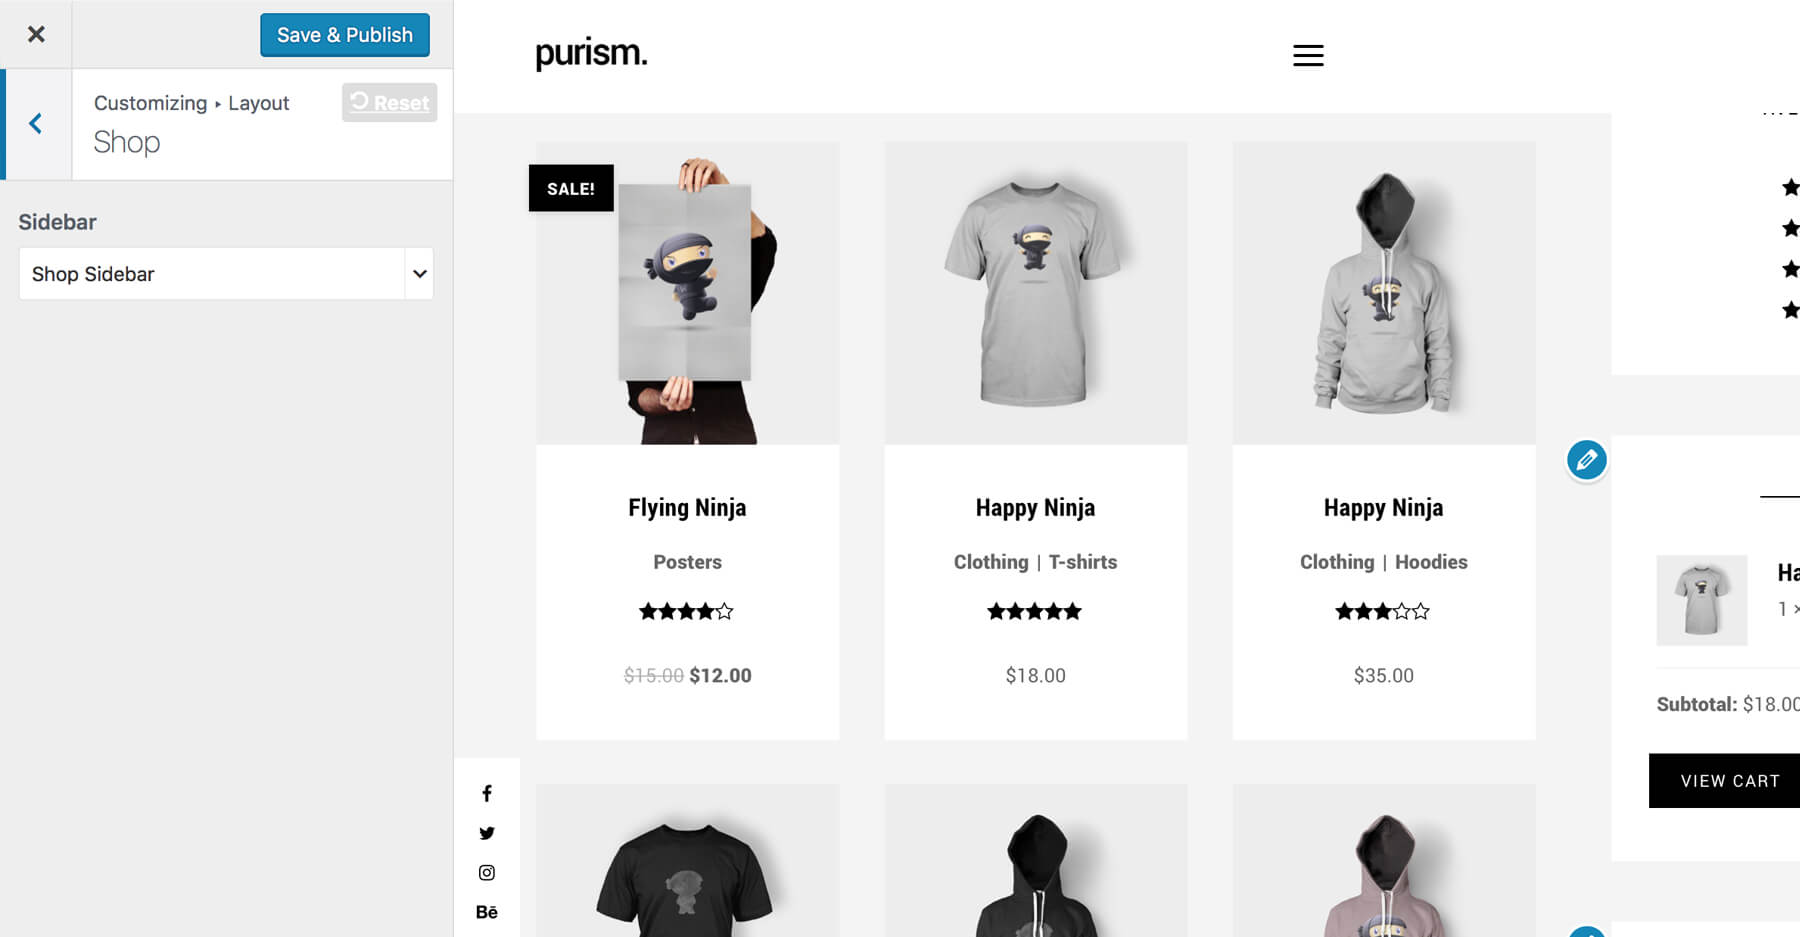
To enable or disable the sidebar area on your shop and product pages, head to
Appearance → Customize → Layout and choose the Shop section.
You can also enable or disable the sidebar or shop sidebar on the Shop and Single Product Page.
To edit the sidebar for account, cart, wishlist and checkout, navigate to
WP Dashboard → Pages.
Select the page and choose the option you want from
the select field in the Layout Settings metabox and click Update.
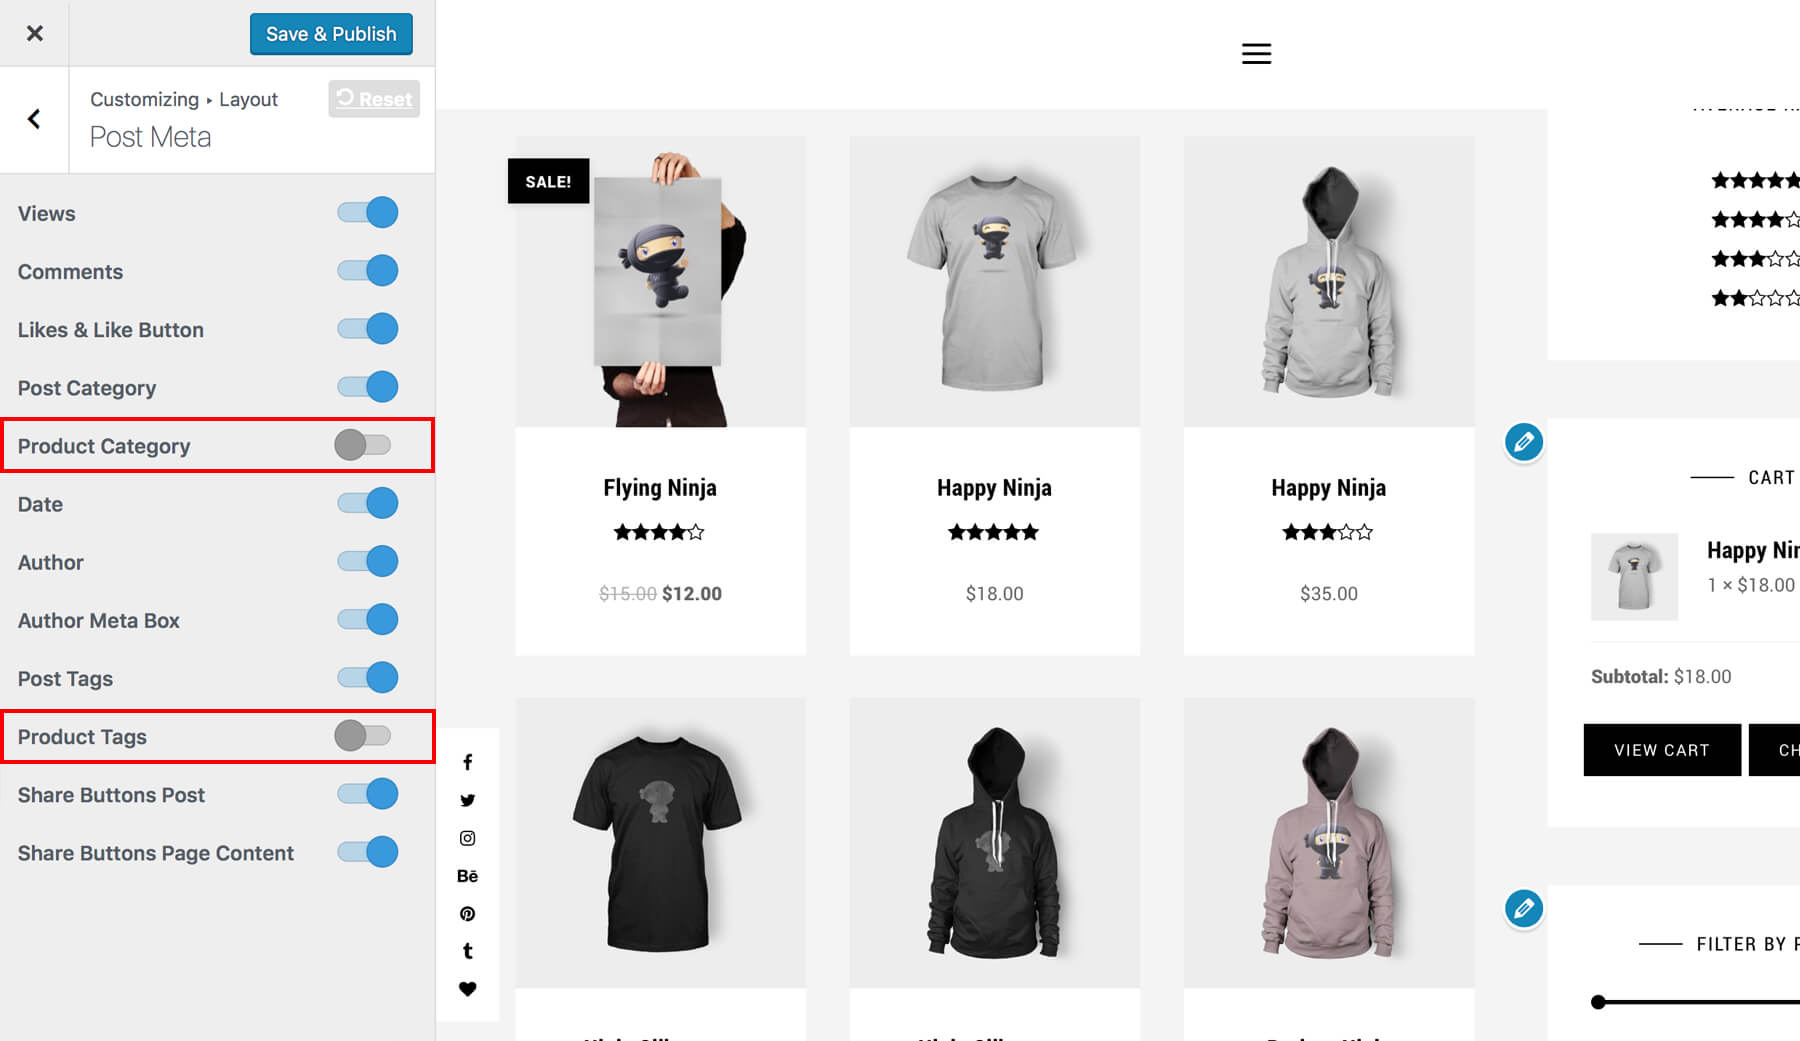
21.5 Metas
You may hide certain Product Meta.
- Go to Wordpress admin panel and navigate to Appearance → Customize
- Open the Tab Layout → Post Meta
21.6 Quick View & Wishlist
The Estelle Wordpress theme will come with additional two shop extensions. To use these
extensions you need to install and activate the plugins YITH WooCommerce Quick View
and YITH WooCommerce Wishlist.
(See also: Plugin Installation).
After installation and activation of the wishlist plugin an additional page will be created on WP Dashboard → Pages.
- Quickview: On the shop page (product overview) you will get a zoom icon when you go over a product image (mouseover). With clicking to the zoom icon the product details will be shown in a popup.
- Wishlist: On the shop page (product overview) you will get a heart icon when you go over a product image (mouseover). With clicking to the heart icon the product details will be add to the wishlist. On the product page you can add your product to wishlist with "Add to Wishlist".
Settings of the features "Quick view" and "Wishlist" can be edited in WP Dashboard → YITH Plugins → Quick View and WP Dashboard → YITH Plugins → Wishlist
21.7 Adding Shop Pages, Products, Product Categories and Product Tags to your menu
To show your shop on your Website you need to add the shop to your menu.
Please navigate to WP Dashboard → Appearance → Menus.
(See also: Menu)
With the installation and activation of WooCommerce new menu options, e.g. Products,
Product categories Product tags and WooCommerce endpoints are available.
After executing the WooCommerce assistant you will also find additional pages
("Shop", "Cart", "Checkout" and "My Account"). After
activation of the wishlist plugin you will also see the page "Wishlist".
Activate the checkboxes beside to the menu elements that you want to add to your menu.
If you have done your selection please click to Add to menu. Via drag and drop you
can arrange the menu to your needs or create submenus. If finished, please click
Save menu to save your settings accordingly.
22 Shortcodes & Styles
22.1 Shortcodes
To use Shortcodes the Plugin "Egotype Shortcdes" need to be installed. (See also: Plugin Installation) Shortcodes can be added and used to show elements like tabs, alerts, etc.
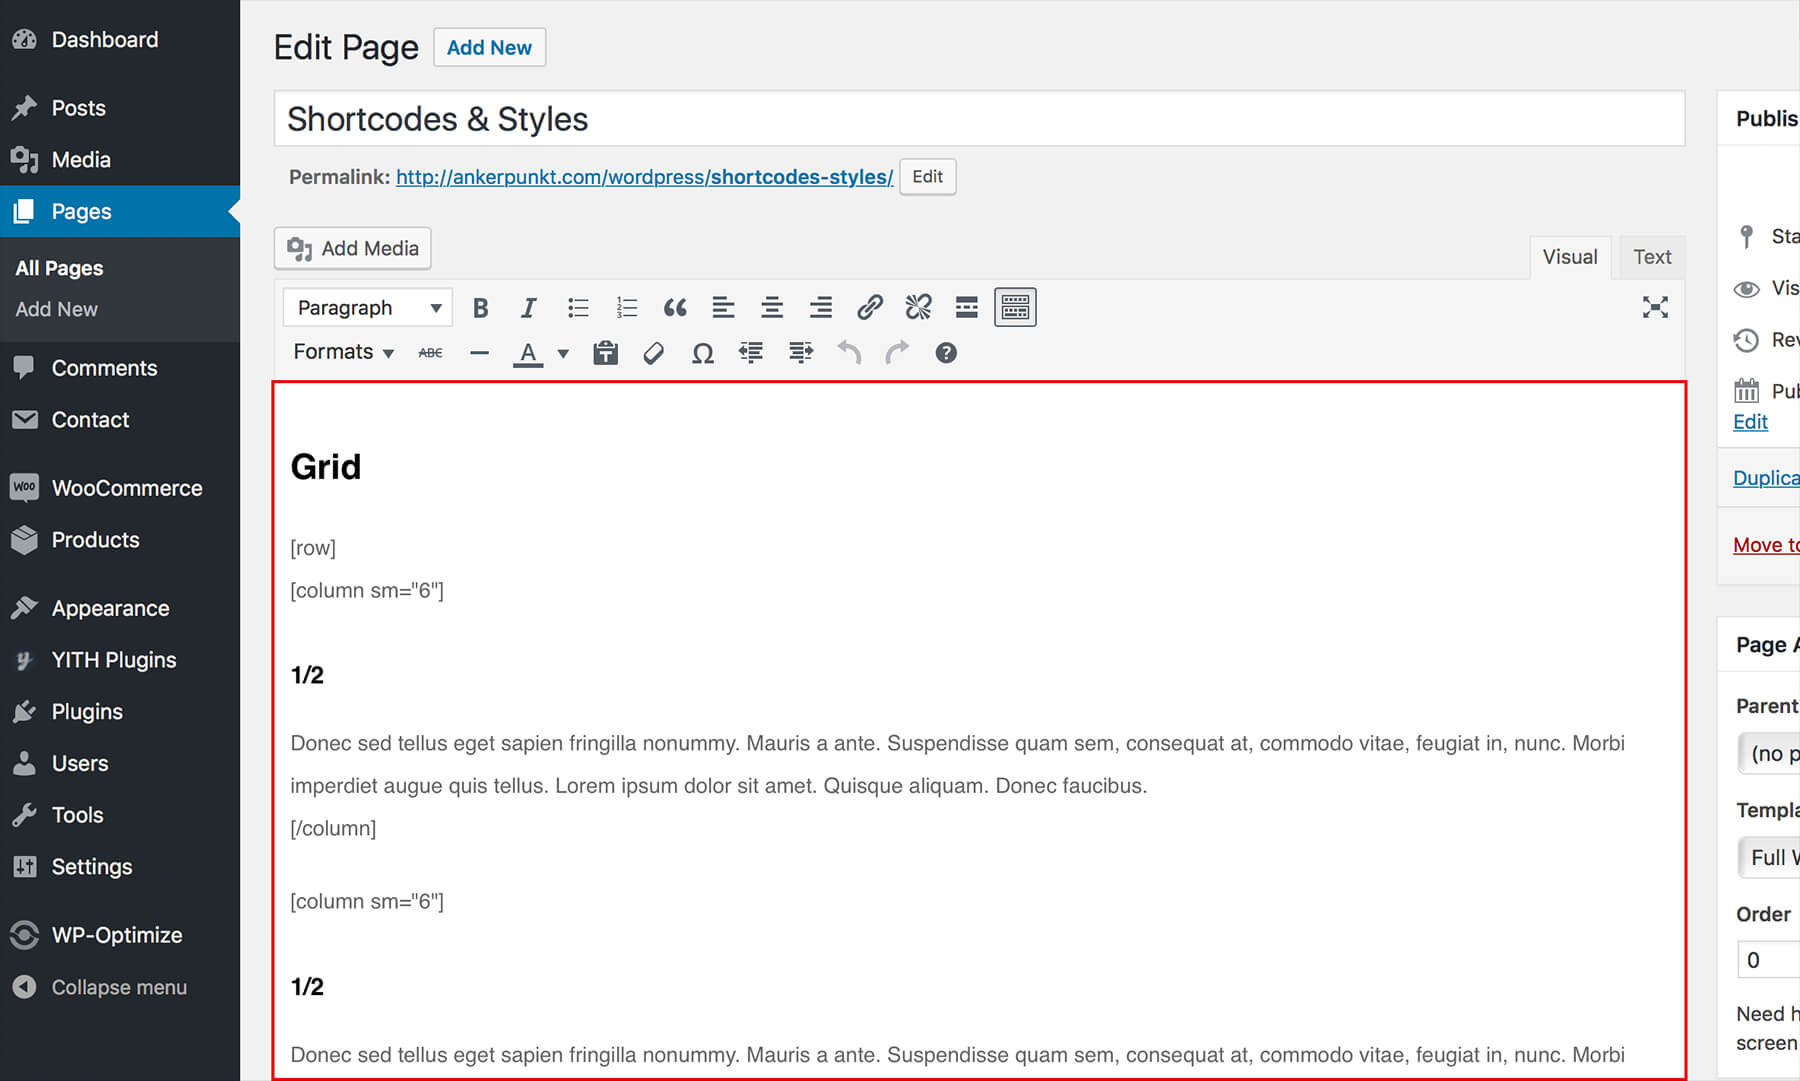
Grid
[row]
  [column md="6"]
    ...
  [/column]
  [column md="6"]
    ...
  [/column]
[/row]
- [row] [/row] – Use rows to create horizontal groups of columns
- [column] [/column] - Grid columns will created by specifying the number of twelve available columns you wish to span
| Parameter | Description | Required | Values | Default |
|---|---|---|---|---|
| xs | Size of column on extra small screens (less than 768px) | optional | 1-12 | false |
| sm | Size of column on small screens (greater than 768px) | optional | 1-12 | false |
| md | Size of column on medium screens (greater than 992px) | optional | 1-12 | false |
| md | Size of column on large screens (greater than 1200px) | optional | 1-12 | false |
Accordion
[accordion]
    [collapse title="Panel 1" active="true"]
        ...
    [/collapse]
    [collapse title="Panel 2"]
        ...
    [/collapse]
    [collapse title="Panel 3"]
        ...
    [/collapse]
[/accordion]
- [accordion][/accordion] – Wrapper of panel components
- [collapse][/collapse] - Specific panel
| Parameter | Description | Required | Values | Default |
|---|---|---|---|---|
| title | Title of the panel | required | String | false |
| active | Specify the active panel | optional | true | false |
Tabs
[tabs]
    [tab title="Tab 1" active="true"]
        ...
    [/tab]
    [tab title="Tab 2"]
        ...
    [/tab]
    [tab title="Tab 3"]
        ...
    [/tab]
[/tabs]
- [tabs][/accordion] – Wrapper of tabs
- [tab][/tab] - Specific tab
| Parameter | Description | Required | Values | Default |
|---|---|---|---|---|
| title | Title of the tab | required | String | false |
| active | Specify the active tab | optional | true | false |
Alerts
[alert var="info" dismiss="true"]
    ...
[/alert]
- [alert][/alert] – Alert
| Parameter | Description | Required | Values | Default |
|---|---|---|---|---|
| var | The variation of alert | required | success, info, warning, danger | info |
| dismiss | If the alert should be closable | optional | true, false | false |
Social Media
[socialgroup align="center" inverse="true"]
    [social account="facebook" link="www.facebook.com" count="3K" label="Followers"]
    [social account="twitter" link="www.twitter.com" count="300" label="Followers"]
[/socialgroup]
- [socialgroup][/socialgroup] – Wrapper of Social Media Icons / Buttons
| Parameter | Description | Required | Values | Default |
|---|---|---|---|---|
| align | Alignment | optional | false | left, center, right |
| inverse | Dark background, light text | optional | true, false | false |
- [social][/social] – Social Media Icon / Button
| Parameter | Description | Required | Values | Default |
|---|---|---|---|---|
| account | Social media plattform | required | facebook, google-plus, twitter, instgram, vimeo, youtube, tumblr, xing, linkedin, soundcloud, rss, pinterest, bloglovin, behance, dribbble, github | |
| link | Link of Social Media Profile | optional | string (url) | false |
| count | Number of Followers/ Subscribers etc. | optional | string | false |
| label | Additional Labele | optional | string | false |
22.2 Style Formatter
Go into the style editor of a post or a page. Please make sure that the style
editor is set to "Visual".
Click the icon "Toolbar Toggle" (1) if the second format bar is set to hide.
Via dropdown "Formats" (2) you are able to apply styles for buttons, drop caps,
lead ins and separators for specific elements (like paragraphs, lines and hyperlinks)
- Buttons - Format is applicable to hyperlinks
- Drop Caps - Format is applicable to paragraphs
- Lead Ins - Format is applicable to paragraphs
- Separators - Format is applicable to lines

23 Changelog
Version 1.1.7
Release Date: Oct 07, 2019
– Fix: Instagram Feature– Update: Woocommerce TemplatesVersion 1.1.6
Release Date: May 02, 2019
– Update: Woocommerce TemplatesVersion 1.1.5
Release Date: Jan 16, 2019
– Update: Woocommerce Templates
              – Update: Shop layout as dynamic feature
              – Fixed: Comments translation
              – Fixed: Sponsored Post Permalink
Version 1.1.4
Release Date: Apr 19, 2018
– Update: Woocommerce TemplatesVersion 1.1.3
Release Date: Jan 29, 2018
– Update: TGM Plugin Activation Library
– Fixed: Teaser Widget external link
– Added: Teaser Post Link to image
– Fixed: Views/Likes Counter
Version 1.1.2
Release Date: Nov 16, 2017
– Update: Kirki Customizer LibraryVersion 1.1.1
Release Date: Oct 25, 2017
– Update: Woocommerce Templates
– Fixed: Recent Posts Widget (number)
Version 1.1.0
Release Date: October 04, 2017
– Added: Woocommerce Support
– Added: Shop Sidebar
– Added: Customizer Shop Settings
– Fixed: Media upload class
Version 1.0.0
Release Date: September 13, 2017
First Release24 Credits
Post Images are used in the demo: Unsplash
25 License
The Purism Wordpress Theme of our items are covered by Themeforest license Themeforest License
26 Support
We truly appreciate that you've chosen the Purism Worpdress Blog Theme. Customer satisfaction is our priority and we understand that sometimes you need help. We provide friendly and helpful support so don't hesitate to ask!
If you have a problem or an support request, please fill out the following form
completely.
As a rule, we will reply within the next 24 to 36 hours.
We are based in CET Timezone
Our regularly office times are from 9.00 am to 05.00 pm.
Attention: Please fill out the contact form correctly. This is the only way we
can guarantee the best support for you. If something is missing we can´t help because
we need to know that you are an official buyer of our template.
Thank you for your understanding.
12 Social Media Links
You may want to display a list of your social accounts in the Navigation Bar (see also: Navigation Bar). To adjust your social accounts navigate to Appearance → Customize → Social Media Links
Here, you will see a list of supported social networks followed by a text input box. If you'd like to have a social icon for a particular social network, please fill in the profile's URL for the social network you want to add and move the Toggle "Show" to the right.
Once you enter the URL into a related social network's text box, its icon will appear in your social icon area on the left side. If a social network's box is blank, the social icon will not appear.